Homesteading is a way to connect with the land and be self-reliant. Learning some essential DIY homesteading skills will help you in your journey. I explain some below. Some are easy; once you know how to do it, you will be able to do it. Others, may take more research.
Remember, it was hard for our ancestors who first settled on the frontier in the days of the American Colonies, and it’s just as hard for those who choose to live in some the most remote locations in the United States.
Technology can’t always stop water lines from freezing in below zero temperatures, or coyotes from trying to get in the coop, or a drought that leaves crops withering and dying on the vine.
No matter how you look at it, there’s a multitude of challenges that farmers and homesteaders alike have to deal with in order to pursue this way of life.
So when it comes to keeping the house running smoothly, you can’t afford to leave all of your repair work to someone else.
Besides the high costs associated with hiring carpenters, electricians, and plumbers to make repairs, there can be delays because of scheduling and a lack of qualified technicians available.
Also, you may pay a premium if you have an emergency and need emergency or on-demand service. You can get away with having an electrical outlet or two that won’t put out a current, but a septic system backing up or having a faucet leaking so bad that it floods the kitchen? That just can’t wait.
If you’re a homesteader or if you are looking into this way of life, it’s smart to seek out home maintenance tips. You may want to learn the basics of some things too so you can start learning how to do your own repair work.
Important DIY Skills to Know
Below are the most critical DIY skills you need to keep your homestead running smoothly. I recommend some basic tools as well.
Fix a Leaky or Clogged Faucet
One of the most commonly associated problems with any house, whether it’s a farmhouse in the Big Sky country, or in the heart of Brooklyn, is the faucet.
They can freeze, have low water pressure, or develop leaks. Ignoring a leak can lead to significant water damage. The good news is that most faucet repairs are straightforward and don’t require a lot of tools.
Essential DIY Plumbing Tools
- Adjustable wrench
- WD-40
- Hammer
- Old towels
- Clog remover (e.g., Draino or Liquid Plumber)
- Latex gloves or dishwashing gloves
- Pipe brush
How to Fix Leaky Faucet
- Start by shutting off the main water valve to your home, both to stop the leak, and to keep water from spraying everywhere while you make your repairs.
- Check the water hose connecting to your faucet. Ensure that it is seated in the grooves, and is twisted down tightly. If not, tighten with your hands or your adjustable wrench.
- If the line connector is already firm, check for rust, cracks, or breaks. If this is bad enough, you’ll need to replace the hose. If it isn’t too advanced, remove with your adjustable wrench, and use WD-40 if it’s difficult to remove. Clean off any excess rust and reconnect the hose.
- If you’ve noticed that water has been slow to drain, or pooling in the sink, begin by pouring approximately half the bottle of your clog remover down your drain. Wait a half hour, then flush with hot water.
- If that doesn’t fix the problem, put on your latex gloves, and place towels below the PVC piping to catch excess water and filth.
- Remove the PVC piping connecting to your drain using your adjustable wrench, lightly tapping with a hammer if you need to to loosen the connector.
- Using your pipe brush and fingers, remove as much gunk, filth, and stoppage as you can.
- Repeat Step 4, and ensure the water is draining normally.
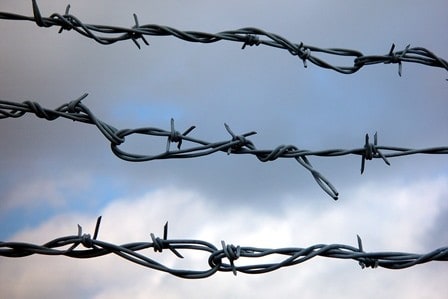
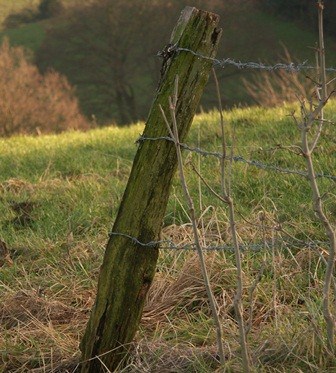
Repair a Strand of Barbed Wire
If you’re a homesteader, you may keep livestock of some form. Even if you don’t, you may want to protect your property from wildlife. Think of that garden you spent hours working on…
Maintaining fences is vital. Barbed wire fences, in particular, may break due to various reasons like weather or from animals.
When this happens, you’ve got to detect the break quickly, and fix it.
Fence Repair Tools You’ll Need
- Thick leather gloves or wiring handling gloves
- Eye protection goggles
- Strand of barbed wire
- Fencing sleeves
- Heavy duty pliers with cutter
- Hammer
- Fencing staples
Steps to Repair a Barbed Wire Fence
- If yours is an electrified fence, begin by shutting off the breaker running a current through your fence.
- Wearing your gloves and goggles, begin by removing any barbs about six to eight inches past both sides of the break.
- Measure out enough wire to extend about half a foot past both sides of the break when pulled taut.
- While keeping the wire taut, use fencing sleeves to crimp the replacement strand to the broken strand. Crimp the sleeve down, leaving about one inch of loose strand on each end.
- If the entire strand needs replacing, find the fencing staple connecting the broken strand to the fence post. Cut the strand with your pliers, leaving about three to four inches. Staple the excess back into the fence post using your hammer and fencing staples.
- Measure out enough new strand that you’ll be able to wrap about halfway around the fence post when pulled taut.
- Cut the new strand with your pliers, then connect to the fence post using two fencing staples on each post.
- In either type of break, check the tension when you’re finished. The new strand should move no more than about half an inch under steady pressure. Check your other strands while you’re at it.
- Turn your breaker back on. Test the current by either using a multimeter, or taking a blade of long grass with your bare hands, and touching the tip to the new strand. You’ll receive a slight shock, that won’t harm you, if the current is live.
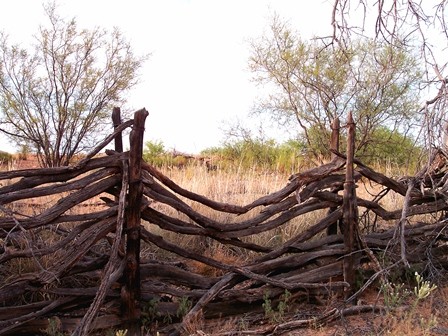
Building New Fences
Whether you opt to use barbed wire or wood to protect your home, dissuade wildlife, and/or corral your livestock, it’s likely you’ll have some fencing on your property. Being able to build and maintain fences is an essential DIY skill and relatively basic task.
Necessary Tools for Installing Fencing
- Leather or workman’s gloves
- Wooden planks (3/4″ to 5/8″ thick)
- Shovel
- Wood nails or staples
- Hammer
- Measuring tape
- Level
- Post hole digger
- Ink or paint pen
- A responsible assistant
How to Install a Fence
- Before you do anything else, measure out the area where you’re going to install your fence. The distance between fence posts can vary, but I’d recommend that you go no more than 15 to 20 ft. in between posts. You also need to how high you want your fence to be, and the gap you want to leave in between each board. Common livestock fences are usually between five and seven feet high, but if you keep horses, it may need to be higher.
- Using your measuring tape, measure out the distance between your fence posts. Mark the position using a rock, flag, or whatever you choose.
- Wearing your gloves, and using your post hole digger, dig a rounded or squared hole. Dig at least a foot deep, and keep your dirt in a consolidated pile.
- Insert your post hole. Have your assistant hold the pole upright and rigid. Using your leave, ensure the post is straight up and down, and level. Ensure the post reaches the desired height. If not, pull out and replace some dirt, or dig deeper.
- Pack the excess dirt in around the base of the post using your shovel.
- Repeat Steps 2 through 5 for a second post.
- Use your measuring tape to the position of the first plank between the posts. Mark the position with your ink or paint pen. The plank should extend halfway across the post.
- Have your assistant hold the plan in position, and hammer in the top corner of your plank on either post.
- Using your level, ensure the plank remains horizontal and flush with the post.
- Hammer in the remaining corner.
- Use your measuring tape to gauge the gap between planks.
- Repeat Steps 6 through 11 until your fence is complete.
Share Your Homesteading Knowledge
Yes, we enjoy far more advanced technology than our forefathers had, but for the homesteader, there are certain aspects of life that no computer or piece of machinery can solve.
I hope you’ve find these three DIY Skills and tips useful, and will make your hard life at least somewhat easier.
The greatest resource that you have with a rural lifestyle is your friends and family.
They’ll be there to support you, both in the good times and bad.
Return the favor by spreading the knowledge that you’ve gained while you go about your day.
Get on your social media, or start your own blog, and share your advice with those who you may not even know need it.
There’s no such thing as an easy life when you’re a homesteader – just a life well lived.
Related Articles: