No-till Gardening Guide – Advancements in the field of gardening have introduced different ways of preparing the soil and planting the crop.
These methods promote better crop growth and increased yield.
One of these impressive methods is no-till gardening.
This particular style of gardening does not require any kind of tilling.
Instead, you start planting the crop without exposing the dirt.
With this method, you put decomposable materials on top of the soil and leave the rest to nature.
Due to amazing outcomes, this type of gardening is gaining in popularity.
You can apply this style of gardening in small garden beds or in larger settings.
The basic idea that powers no-till gardening is to relieve you from the hard work of tilling.
Furthermore, plants grow much more easily in natural settings.
Therefore, theoretically, it helps to take care of your garden in a more organic and less expensive manner.
This usually tends to inspire a lot of people, and, if you are inclined to learn the basics of no-till gardening, here is a complete guide to assist you.
What to Consider when Making a Transition
A lot of gardeners claim that no-till gardening saves more time, as there is no tilling involved.
Plus, you need to put in less effort, because there is less work to do.
This may appear to be true in the long run, but, first, you need to make a successful transition.
This requires you to work a little bit extra at first, but as things settle down, you will start getting the benefits of no-till gardening.
You need to follow many new habits and shift your mindset while managing your land.
Garden Size
No doubt, if you want to convert a large area into a no-till garden, you have to work harder.
It also affects the method of gardening that you are trying to follow.
For example, if you own a small garden, you can simply gather and use several old newspapers on the desired patch of ground.
After that, you can purchase a small number of wood chips and mulch to spread on the area.
In addition, you can get the required amount of chicken fertilizer by raising a few chickens.
This will help fulfill the manure needs of your no-till garden.
However, things can be challenging if you have a large garden.
You have to gather more newspaper, wood chips, and mulch.
For this purpose, you may need to buy these items from the actual suppliers.
This will increase the overall cost of managing your no-till garden.
Therefore, prior to making a decision about the garden size, make sure to analyze the number of available resources and manpower.
Garden Supplies and Garden Materials
Once you have decided about the area of your no-till garden, the next step is to find the easiest ways to find essential materials.
If you are residing in a rural area of your town, you might find it difficult to access different suppliers.
These companies play a key role while dropping off items, such as wood chips, compost, and mulch.
If you don’t have easy access to those companies, you won’t be able to manage a large no-till garden.
However, you can continue with this method if your garden is small and most of the items are available to you.
On the contrary, if you live close to such facilities and can easily access the required items, that will be a positive sign that you can begin no till gardening on a large scale. How to Start Composting
How to Start a Garden on a Budget
When thinking about following the no-till gardening method, it is essential to designate a specific budget to such a venture.
If you need items for your land and free resources aren’t available, the cost of running a no-till garden tends to be higher.
Hence, you have to be wise when making such a transition.
For this purpose, you have to decide what amount of funds you have available when purchasing the essential items.
You have to analyze which method would be more feasible and budget-friendly.
If you find it less expensive to follow the tilling method, you can go with that, instead.
However, if you have sufficient funds to purchase the materials and items for your no till garden, it would be more appropriate for you to choose this method.
Don’t Forget to Rotate the Crops
Crop rotation is a great way to strengthen the plants and increase the yields.
During the tilling method, you expose the pests to the air and lower their strength. This makes the plants less vulnerable to diseases.
When talking about no-till gardening, though, you don’t disturb the soil.
This results in the increased growth of pests and increased danger of your crops being destroyed.
To combat this, make sure to rotate your crops every year.
Cover Crops to Protect the Garden
In the winter, planting cover crops serves as a great way to protect the soil.
This helps preserve the mulch and offers continuous nutrients to the plants.
Moreover, nitrogen and other micro-nutrients also attract other soil organisms.
For this purpose, you need to select a non-grass type of cover crop.
This is necessary because grassy plants require tilled ground, so these plants are not well-suited to no-till gardening.
Avoid Walking in the Garden Beds
In the case of a tilled garden, you have to loosen the soil each year by using mechanical methods.
When you are dealing with no-till gardening, though, there is no need to loosen the soil.
However, you have to stop walking on the beds.
It causes compaction, which destroys the soil organisms and their tunnels.
Garden Mulch
Mulching is a viable method to create a perfect environment for the growth of beneficial soil organisms.
Furthermore, it also minimizes the growth of weeds.
Try to mulch within the rows of plants, making sure not to disturb the plant stems.
Wood chips also serve as the perfect topping.
You have to keep in mind that the wood chips stay on top of the soil, and you need to avoid mixing them within the soil.
Instead, you need to allow the wood chips to decompose naturally.
During the winter, you may need to consider mulching with the help of shredded leaves.
Tips to Follow When Creating a No-Till Garden
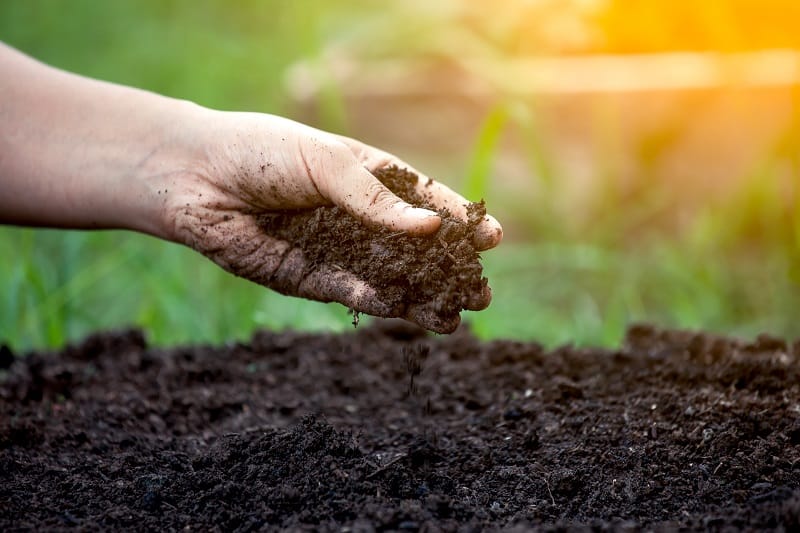
Prior to creating your no-till garden, it is essential to keep in mind a few things.
The most important topics are discussed below.
Designating the Garden Space
The first step when starting a no-till garden is to select the perfect space.
Make sure to choose a place where there is an adequate amount of sunlight.
Furthermore, also consider the quality of the soil.
This is important to help you have less preparation to do when planting the crop.
Gather Materials for No Till Gardening
When you have decided to start no-till gardening, the most important thing to pay attention to is the collection of materials for this method of gardening.
A few of the things that you initially need include leaves, newspaper, chicken fertilizer, compost, and wood chips.
The newspaper is a great way to kill the grass.
You just need to lay it over the grass and wait.
It is biodegradable and provides some essential elements for the preparation of the ground.
After that, you need to add composting items.
You can add the chicken fertilizer and old leaves in the form of layers.
In the beginning, you have to put down several materials to provide a good foundation for the garden.
After that, you need to spread the wood chips in the form of a thick layer.
Layering the Garden
Once you have added all the items, it’s time to start the layering process.
The first step is to cover the required space with the newspapers.
After a few days, cover the area with some more newspapers.
This will stop the grass from sprouting in different places within your garden.
If you can’t find enough newspapers, cardboard also serves the purpose well.
In fact, you can use anything that blocks the light and decomposes over time.
After the first stage, the next step is to introduce the layer of old leaves.
If you place the leaves between the newspaper and compost, they will stay in place.
Therefore, after adding the leaves, create a thick layer of compost.
When you are working in a small garden, you can easily make enough compost for the area.
Nevertheless, for the larger area, you will need to buy compost from the supplier.
The price of the compost is quite reasonable, and you can order the required amount from a local nursery.
Before setting up for no-till gardening, make sure to buy the compost in advance.
The next step is to add chicken fertilizer.
If you are raising chickens on your farm, you will be able to get the required amount of chicken fertilizer without any extra effort.
To spread it evenly, you need to break down the chicken fertilizer into small particles.
After that, use the wheelbarrows to spread it evenly over the garden.
The final step is the addition of wood chips.
These chips are large in size and retain most of the moisture.
This material also composts over time and serves as a fertilizer.
The wood chips take a lot of time to decompose and are acidic, too.
Hence, prepare your garden almost 6 months before starting no-till gardening.
When to Plant My Garden
Once you have prepared your garden with all the necessary layers, there isn’t much you can do except to wait.
Normally, people add the materials at the start of the fall season and allow the materials to settle down over the winter.
This makes it possible to start planting in the spring.
When the right time arrives, just use the hoe to create some rows and start planting the crop.
You should try to tuck the mulch back and cover the area around your plants. This will help keep the weeds down.
Taking care of Soil Organisms
When it comes to tilling it is a method to break up and loosen the soil.
As a result, the weeds are buried in the soil and nutrients come to the surface for easy access by the plants.
The basic thinking behind this concept is to keep the soil free from weeds, as long as you are planting your crop at the place.
However, tilling tends to destroy fungal networks, which are the sticky exudates that consist of different soil organisms.
These organisms help to hold the soil and its nutrients together.
In addition, tilling also reduces the humus, which is the organic component of soil.
This element plays a great role in the growth of the plant.
As a result, in no-till gardening, you have to add more soil amendments to compensate for the humus soil.
Most of the people that have made a successful transition to the no-till method are enjoying its advantages.
The presence of microorganisms benefits the soil, and no-till gardening provides the best environment for the growth of such microorganisms.
Furthermore, these soil organisms are also beneficial, as they keep the soil loose, healthy, and full of nutrients.
If you want to encourage the soil microorganisms to thrive in your garden, make sure to follow these steps.
Use Weeds as Fertilizer
Increasing the presence of soil organisms in your garden isn’t an overnight phenomenon.
In fact, it may involve years of hard work that pays off in the end.
Initially, you have to struggle a little while making the transition from regular gardening to no-till gardening.
You may have to face the issue of uncontrolled growth of weeds, which turns out to be challenging for the newcomers.
In some cases, people may leave the idea of no-till gardening and switch back to regular methods.
As a matter of fact, weeds are simply doing their job for which nature has created them.
They are essential for providing the relevant nutrients to the soil.
You must keep in mind that you will always come across the issue of weeds to some extent.
Even if you are looking at a healthier garden, you can spot some of the weeds growing in some places.
However, an abundance of weeds is the issue that you need to tackle.
This is an indication that the soil is lacking organic matter and requires proper nutrition.
If you have time, let the soil stay as it is for a year or so.
This will help you to take advantage of nature’s ability to create such an environment, which is essential to generate organic matter.
However, you have to visit the garden once a week to chop and drop the weeds.
This step is essential, as the weeds will bear seeds and disperse them everywhere if you don’t chop them.
This procedure fertilizes the soil through the decomposition of chopped weeds.
The decaying roots will serve as easy food for beneficial soil organisms.
How to Plant Your Garden
When it’s time to plant, you should use the digging fork to create holes in the soil.
It will also help to improve drainage and loosen the soil.
While doing so, excavate the weeds softly without tilling the soil.
This type of method is less difficult than some other ways of getting rid of weeds.
In fact, you must try to keep the soil intact while planting the crop.
Just dig a few inches while planting the crop and disturbing the weeds.
Follow the same procedure when harvesting, where you need to put all the foliage back to the soil.
Digging up to only a few inches provides some fresh air to the soil without disturbing soil organisms and their habitat.
As a result, your no-till garden plants will grow strong and yield more.
Moreover, it will also help to regulate water usage, which helps the plant while dealing with extremely dry or wet periods.
Advantages and Disadvantages of No-Till Gardening

Just like any other type of gardening, no-till gardening has its pros and cons.
If you can handle the cons well and continue with this method, you can obtain more benefits for your garden than you would normally get.
Given below are some of the most prominent advantages and disadvantages of no-till gardening.
No Till Garden Advantages
There are numerous benefits of no-till gardening.
However, here we will try to explain only a few of the most obvious ones.
Natural Method of Gardening
Going against nature has its own repercussions.
However, when you are taking assistance from nature, everything goes smoothly.
The method of no-till gardening is exactly the same, as it happens in a natural environment.
Therefore, if you see the forest and observe a variety of plants thriving there, you will realize that no-tilling was done at all in that area.
In fact, the growth of plants and trees is the result of natural composting, which is a continuous process in a natural environment.
Hence, no-till gardening is a way to follow the footsteps of nature and develop a strong bond with it.
It helps you grow organic food, which is more nutritious and healthy than farm products.
Simple method to Start Organic Gardening
When you continue with no-till gardening for a long time, it will allow you to plant your crop organically and yield an organic harvest.
Theoretically, the process of no-till gardening is a lot easier than any other type of gardening.
For example, when you till your garden, you often have to purchase various types of organic fertilizers.
With the help of this particular method, the garden generates the required material on its own.
You just need to prepare the ground, and the rest of the job is done by nature.
Hence, with the availability of nutrients, organic gardening becomes much more feasible.
Especially if you can’t afford to buy organic fertilizers, no-till gardening is the best way to consider.
More Harvest for your No Till Garden
When following this method on a long-term basis, you can get more yield from the same area.
There are numerous examples of no-till gardening where the gardens are completely flourishing.
These types of gardens offer maximum harvests, which you don’t see in other types of gardens.
If you want your plants to grow in a natural environment, you need to follow the natural methods.
At present, you won’t find any other method more natural than no-till gardening.
Therefore, the results you get are also promising.
No Till Gardening Disadvantages
Given below are some of the cons of no till gardening.
It is better to know about the disadvantages of this type of gardening before actually starting the work.
No Till Requires a Lot of Effort
No till gardening requires a lot of preparation work, which means you have to spend more time in the garden.
Before you actually start working on no-till gardening, you need to gather a lot of materials.
This requires your time and effort. Initially, you may find it hectic to collect the materials for your garden.
Things may become even more difficult if you have a large garden.
For instance, if you have to place the first layer of the newspaper, it may take a whole day.
Furthermore, you need to track down the wood chips every year to use the required amount in the garden.
Similar is the case with chicken fertilizer, which you need to gather and spread over the layers of other materials.
Below is a short video about the list of pros and cons of till vs no-till gardening:
Need to Put Thick Layers
Putting down thick layers is necessary for successful no-till gardening.
The layers of composting materials should be adequately thick, which means you have to collect more material.
If you have a large garden, gathering the required amount of material won’t be an easy task.
You need to work constantly with the purpose of collecting the materials for your garden.
Also, even if you are working diligently, failure to follow the right procedure may ruin all your efforts.
For example, if you fail to make your layers thick enough, you can’t destroy the grass and other weeds.
No Till Gardening Pros and Cons
Initially, managing a no-till garden appears to be a difficult task, but, with the passage of time, you will be in a position to enjoy its numerous benefits.
By following the path of nature, you are helping the environment around you by utilizing nontoxic elements.
Furthermore, you can also feel the satisfaction and joy of learning the natural way of creating fertilizers and supporting the growth of beneficial soil organisms.
Related Content: Gardening Mistakes, Could Be Costly And How To Fix Them?
- Aeroponics System: How Does It Work?
- How to Build a Rain Garden Tips
- How to Grow Carrots
- Growing Watermelon ~ How to Grow Watermelon
- Grow Potatoes in 5 Gallon Buckets
- Easiest Vegetables to Grow: A Simple Garden Guide
- What Garden Plants Need Lime
- Guide to Growing a Rosemary Plant
- How to Make Plant Roots Grow Faster
- Hydroponics vs Soil: Which Is Better
- What Are Types of Hydroponics
- Straw Bale Gardening – A Beginner’s Guide to Strawbale
- Creeping Charlie – How to Get Rid Of or Manage