Stevia plants grow well in garden beds and containers. They are edible, high-yielding plants that produce all year. They grow much like basil.
I explain how to grow a stevia plant, how to care for it, plant uses, and more so you can grow it at home.
Where Does Stevia Grow
Growing Stevia rebaudiana in the garden means you can enjoy all the benefits like you would when you grow herbs. Simply pick some leaves and enjoy.
It grows as a tender perennial plant in zones 9 – 11 where it is winter hardy. Outdoors, stevia plants thrive in warm and mildly tropical climates. It’s open pollinated by insects, wind, and birds.
If you don’t live in one of these climate zones, you can grow stevia as an annual. It also grows well indoors with enough light. It only needs to pollinate to produce seeds, not to grow edible leaves. This means growing it indoors is okay.
The sweet stevia plant is native to Brazil and Paraguay. It’s also known as yerba dulce which means sweet herb in Spanish. It is now grown in Japan, China, the United States, and elsewhere. People harvest the leaves.
How to Grow Stevia
Stevia plants thrives in warmer, temperate climates. It can only be grown year round in an environment where the ground does not freeze.
Stevia seeds need a lot of light to germinate. Germination takes 7 – 21 days. They are known to be difficult to germinate.
Days to maturity when planting from seed is 100 – 120 days. This means from the day you plant your seeds, the stevia plant will be mature 3 – 4 months.
To speed up the process, you can purchase an established plant.

Stevia Plant for Sale
If you live in growing zones 9 or higher, you may be able to buy stevia plants from your local nursery or garden center. Home improvement centers such as Home Depot or Lowe’s may also carry stevia plants.
If you don’t live in a climate where it can grow outdoors during the winter, you likely won’t find stevia plants for sale in your area. You may live plants on Etsy.
Instead, purchase stevia seeds. It’s important to choose organic stevia seeds when possible. For the negligible difference in cost, it’s worth it.
What’s great is once your stevia plant is established, you can snip branches from it to root and grow additional stevia plants. Put root cuttings in water to propagate additional plants.
If your plant dies in the frost, you’ll already have the cuttings to plant the following spring. This is an easy way to continue growing stevia from one plant.
To keep it developing during the winter, even in colder climates, it is best to root the cuttings at the end of the summer and grow the plant indoors. Using small side branches is advised.
How to Plant Stevia Seeds
Growing stevia from seed isn’t always easy. Light is essential. Start seeds indoors at least six weeks before the last expected frost date. Choose well-draining, nutrient rich, potting soil.
To plant, gently press stevia seeds into the soil. Do not cover with additional soil. For successful germination, seeds require direct light and moist soil. Take care to not overwater. Seedlings should emerge in 7 – 21 days at 68 – 75 degrees F.
Transplanting Stevia
Transplant stevia plants outdoors or into a larger container when they are a few inches in height. If you are planting in a garden bed or directly in the ground, space plants 12 inches apart.
If you are growing in a container, transplant one stevia plant per pot. It should be have enough drainage holes. The container should be a minimum of 12 – 14 inches in diameter. Be sure to plant stevia in an area with plenty of sunshine.
Stevia Plant Care
Regular watering is important. Avoid soggy soil to prevent root rot. Look for signs of wilting.
If you live in a hot, dry climate, be sure to provide afternoon shade for the plants in the hot months. This is especially important if you are container gardening.
Fertilizer isn’t necessary as long as you are growing the plants in nutrient-rich soil. Be sure to avoid adding fertilizers high in nitrogen. This will cause the plant to produce large leaves without flavor.
Pruning is important to help it grow into a bush. The upright branches of this plant need to be nipped back every 4 – 6 weeks in the first few months. Simply pinch off the growing tips. Stevia plants attract few pests or insects.
How to Grow Stevia from Cuttings
Growing stevia from cuttings is easy. If you’ve ever propagated basil, the process with stevia is much the same. Once the plant is mature and established, gently snip of branches from the main stem. Remove the lower leaves to enjoy.
Place the cut side down in room temperature water. In several weeks, roots will grow. In time, you can transplant into a larger container or in a garden. This is a good way to save your crop from freezing during the colder months.
During the winter, in areas without a lot of natural daylight, you can use fluorescent light indoors to keep the stevia plant growing. Roots will start growing in 2 – 3 weeks. Once the weather warms up, and spring is in full bloom, the plant can be taken outdoors and replanted in warm soil.
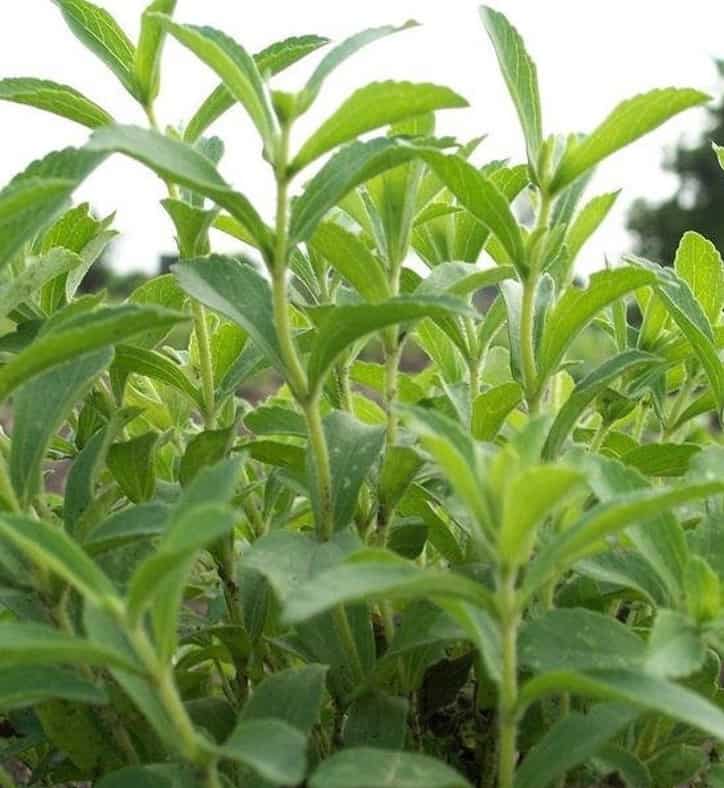
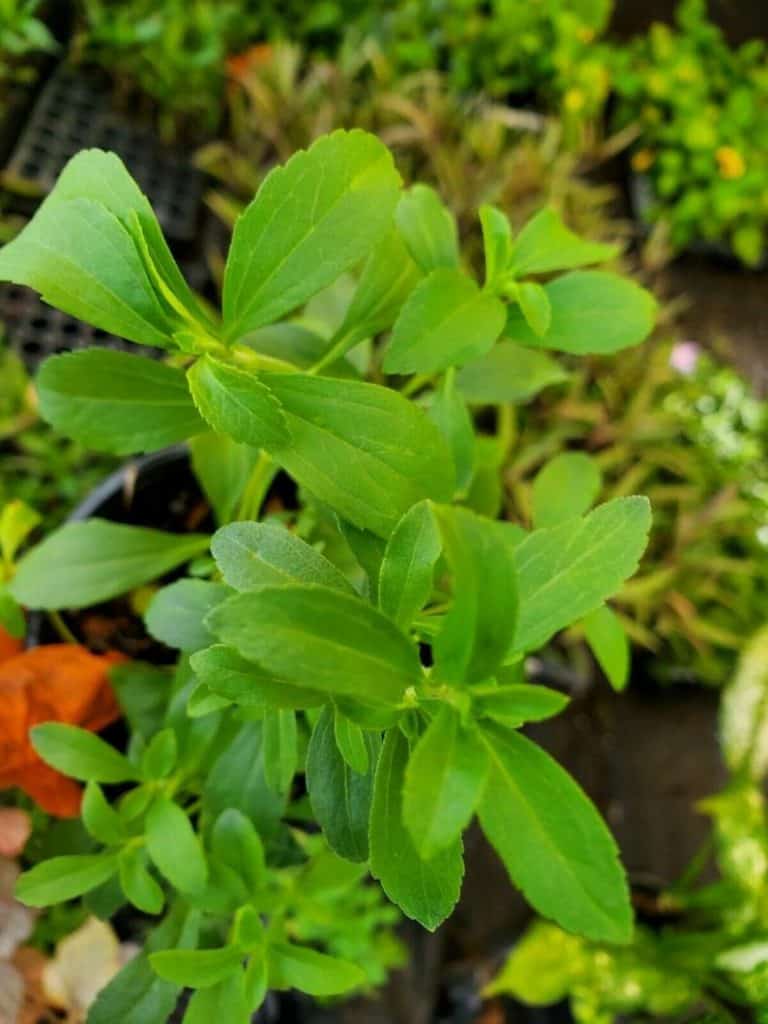
Stevia Plant Appearance
Stevia grows to 18 – 30 inches in height. Pruning within the first several months after transplanting, should make it grow bushy. It has slightly woody stems. Stevia leaves are light green, oblong, and small-toothed. The leaves are tender and sweet with prominent veins.
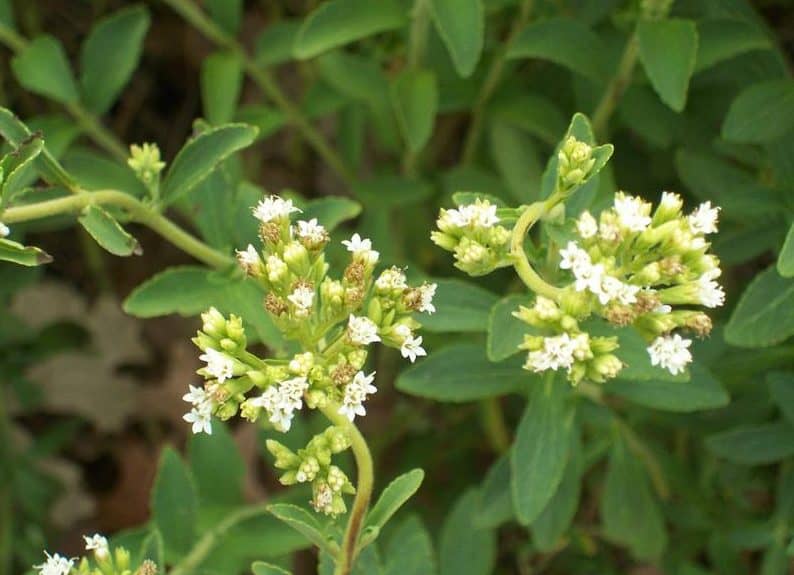
A stevia plant flower will bud and bloom in the fall. Stevia flowers are tiny and white. Pinch them off to keep the plant growing edible leaves.
Harvesting Stevia Leaves
You can snip the leaves once the plant is established. This is generally 4 months after planting. With a mature plant, you can harvest leaves anytime of year. This makes it convenient to pick them when you want to use them which is when they are most fresh.
It’s best to pick leaves in the morning.
Be sure to pick the leaves by early fall. Once the stevia flowers, it will begin to lose its leaves. Alternatively, you can pinch off the blooms to encourage it to continue to grow leaves. If you live in growing zones 9 – 11, it’s important to do this.
How to Use Stevia Leaves
There are many stevia plant uses. You can use fresh leaves, dried leaves, ground up dried leaves as a powder, or make liquid stevia.
Fresh Leaves
Chop or crush just-picked stevia leaf to use in hot liquids. To release the sweetness, they must be in hot liquids. If you want to drink the beverages cold, leave them in the refrigerator overnight.
Fresh stevia leaves are ideal to make hot tea, iced tea, coffee, iced coffee, lemonade, and more.
Dried Leaves
Use dried leaves for months as long as they are stored in an airtight mason jar. However, dried stevia leaves will only their sweet flavor for a few months. You can use a food dehydrator to quickly dry stevia leaves. If you have a few leaves, you can dry them by putting them between the pages of a book.
Another drying method is to hang them in a well-ventilated, dark and dry location indoors.
Or, you can be like me and live in a house for over 5 years before realizing my oven has a dehydrating function!
Powered Leaves
Ground up dried stevia leaves into powder for baking or storage. One tablespoon of ground stevia powder equals one cup of sugar in baking.
Liquid Stevia
In addition to dried or fresh leaves, the stevia plant can be made into a liquid extract similar to syrup. To make liquid stevia:
- Stevia leaves need to be chopped and added into a jar filled with vodka.
- The jar should be left out for two days. Shake periodically.
- Strain the liquid through a coffee filter.
- Cook in a pot for 30 minutes to boil off the alcohol. The liquid extract will become syrupy.
- Store for up to a month in a glass jar.
Liquid stevia extract should be measured by the drop and stored in a refrigerator after completing the boiling. Use it as a type of sweetener as you would syrup or honey.
Tips for Using Stevia Plant Leaves
Here are some tips for using homegrown stevia leaf extract:
- ⅛ equals one teaspoon of granulated sugar
- It won’t caramelize like sugar
- Heat releases the sweetness in stevia leaves; for cold drinks, let it steep overnight in the refrigerator
- Stevia won’t feed yeast (for homemade waffles, breads, etc.)
What is Stevia?
Commercially, stevia plants undergo long processing times. This includes harvesting leaves, drying, extracting water, and purifying. This process will prevent bitterness, and a foul taste often found with crude stevia.
Leaves grows on a bushy shrub. There are 150+ species of stevia but only two produce the useful sweet leaves that contain steviol glycosides.
Growing Stevia
Even if you don’t live in a growing zone with a warm or hot climate, you can grow stevia plants. They grow well as productive houseplants. Outdoors, you can plant them in a container garden. This makes stevia herbs ideal for areas with poor soil or limited gardening space.
Stevia plants grow very sweet tasting leaves. You’ll likely find many uses for them, including adding them to a hot cup of tea. People have used stevia leaves for hundreds of years.
See related:
- How to Dry Basil to Enjoy All Year
- Growing Basil Plant: A Guide for Beginners
- How to Store Food Long Term: Best Tips and Tricks