Setting up a worm farm, also known as vermicomposting, offers numerous benefits for your homestead. These “farms” allow you to reduce food waste efficiently by recycling your food scraps through vermicomposting. In turn, the worms generate organic fertilizer you can use to grow fruits and vegetables.
It is a very efficient way to process organic matter in your garden or on your homestead. I’ll explain the benefits of starting a worm farm and the supplies you need to make a homemade worm farm.
What Is the Point of a Worm Farm?
In horticulture, the point of a worm farm is to recycle food waste. Worms turn veggie scraps into nutrient-rich compost. It’s the ultimate organic fertilizer for your gardens.
What Is Vermicomposting?
Vermicomposting is the process of raising worms and using them to decompose organic waste into compost.
The idea is to use the nutrient-rich compost to amend your soil and organically, naturally fertilize your plants.
A benefit is you’ll be able to avoid using manure, which reduces the harmful emissions that go into the ozone layer.
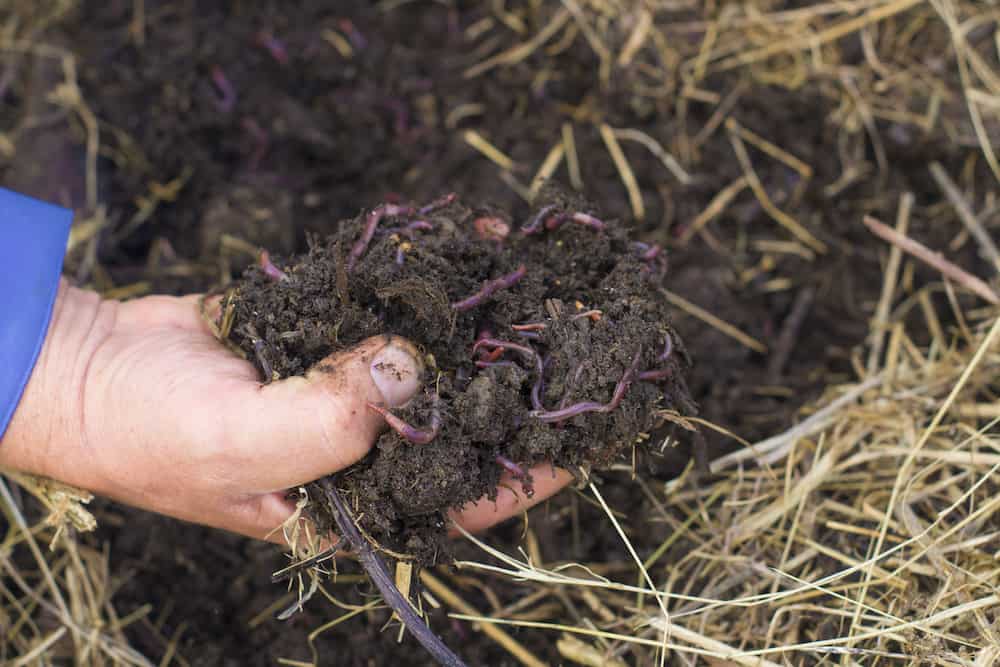
When you have a compost pile with worms, the worms will begin to eat the compost and produce waste. The waste from your worms is known as worm castings, which can be used as a fertilizer.
What Are Worm Castings
Worm castings are the nutrient-rich waste produced by worms after digesting organic material. They are considered to be a high-quality fertilizer. Not only is their waste rich with nutrients, but they also help to increase water retention for healthier plants.
What Is Worm Tea
Worm tea is a liquid fertilizer made by steeping worm castings in water.
What Is Worm Leachate
Worm leachate is the dark brown liquid that drains from the bottom of a worm farm or composting bin with worms. It contains water and waste products.
Benefits of a Worm Farm
There are many benefits to owning a worm farm, but there are a few that are the most prevalent.
Reducing Food Waste
When you discard food scraps in your regular trash, you’re missing out on many opportunities. A far better alternative would be to start a compost pile in your backyard.
By adding worms into your compost, they will begin to eat the food waste and leave fertilizer behind for you to use. As an added benefit, you’ll notice your garbage bins will be emptier weekly by eliminating food waste.
Two Fertilizer Sources
Worm castings are the more well-known fertilizer that worms produce, but there’s another two other types as well: worm tea and worm leachate.
Worm leachate is a phenomenal liquid fertilizer for your plants. All you’ll have to do is drain the worm juice from your worm bin and add it to your soil and plants. Do not use if it is foul-smelling.
Like castings, worm tea is an organic fertilizer that can help to promote plenty of growth.
Inexpensive and Easy
Maintaining a worm farm is exceptionally easy, especially for beginners. Even your kids will love to get involved and often refer to their new worms as their pets. The equipment you need is relatively inexpensive, as there are simple DIY projects you can tackle.
You will use food scraps which are free. In addition, you can use discarded shredded paper, shredded newspaper, or ripped up brown paper bags for the worm bedding.
Clean and Odorless
As long as your worm bin is maintained correctly, you shouldn’t begin to notice any unappealing smells. If it has rotten food stench, it could mean that the bin is too acidic. A well-maintained worm farm will smell like natural earth, which can be a refreshing addition to your environment.
You’ll also want to cover the bedding — use can use wet newspaper — to prevent smells and to avoid attracting fruit flies.
Potential Profits
If you want to make the most of your worm farm, you can think of ways to earn money from it. Teach classes, sell organic produce from the compost your worms make, sell bags of compost, and more.
As worm castings and worm tea are two very popular fertilizers, you can sell your worm farm by-products. You can also market it as organic, as there won’t be any soil conditioners or pesticides used.
Quick Turnaround
There are many ways to make fertilizer, but maintaining a worm farm is one of the fastest. Worms are capable of eating and digesting half of their total body weight daily. This process means that you should have plenty of fertilizer at your disposal.
How Many Worms Do You Need to Start a Worm Farm?
There are a few things to consider when deciding how many worms do you need to start a worm farm.
Cost
The most costly part of your new worm farm venture is the worms themselves. If you’re starting from scratch, you won’t want to invest too much money, as it can be risky at first.
Not only will you be learning how to maintain the farm, but you’ll also need to ensure your worms like their environment. When you’re buying in bulk, worms can be more affordable than in small batches.
With that said, you can expect to pay upwards of $50 for most worms, depending on how many you need.
You’ll also need to consider the type of worms you want, as some species are more expensive than others. As a general guide, here are some of the average prices for the most popular species:
- Red Wigglers – $25 to $30/pound
- Dendrobaenas – Over $30/pound
- European Nightcrawlers – $30 to $32/pound
Family Food Waste
Once you have your budget situated, it’s time to consider how much waste your family creates. Using a small kitchen scale, collect one day’s worth of food that your worms would have access to and weigh it.
Repeat this process every day for a week and then average the totals to get your daily food waste. Using the theory that worms can eat half of their body weight in food can help you decide how many to buy.
If your family has two pounds of food waste daily, you’ll want approximately four pounds of worms in your farm.
It’s important to know what are okay foods to add in. Pretty much anything you would put in compost is okay. This includes foods such as fruit and vegetable scraps. Do not feed them meats, dairy, oils, processed foods, sauces, etc. You should also avoid citrus foods and spicy foods.
Where You Want to Add Compost
It’s also important to consider what you will use the compost for. Do you have big gardens or small pots? Consider if you will grow multiple crops in a year that will benefit from amended soil.
How to Make a Worm Farm
Fortunately, worm farms can be made anywhere, whether indoors or outdoors. This means that you can learn how to make a worm farm whether you have a ton of acreage at your disposal or a small city-centric apartment.
Regardless, making your worm farm is much simpler than you might initially think.
Worm Farming Supplies
First, you’re going to need to get an assortment of worm farming supplies to begin your new project.
- Two Plastic Bins
When choosing your bins, one must be taller and be small enough to fit inside the second bin.
The shorter bin won’t need a top and should be at least 15” deep, 25” wide, and five inches tall. With the extra length, you’ll be able to collect worm tea to either use or sell separately.
The taller bin will need a top so that you can keep your worms contained, as they are escape artists.
You’ll also want to make sure you choose a plastic that can be easily drilled. We recommend getting an 18-gallon tub that is 15” deep, 20” wide, and 15” tall.
- Drill
Along with your drill, you will also need a 1/8” bit and a one-inch bit so that you can drill holes into your bin.
- Screening
When choosing your screening material, make sure you don’t pick metal, as it’s going to rust over time. A better alternative would be to opt for a window or sliding door screen to prevent worms from escaping. You won’t need much of this material, just a piece that’s four by four inches.
- Glue
You’ll need glue to ensure the screen stays in place. We suggest opting for waterproof glue.
- Shredded Paper
Shredded paper is a recyclable and inexpensive worm bedding that you can put to fair use. You’ll need enough of the material to fill three inches of your bin as well as extra for adding in during feedings.
You can use relatively any paper, though it’s recommended you avoid colored and shiny ones.
- Dirt
There’s no need to invest in the dirt, as you’ll only need a pound of it at most. The only recommendation is to make sure it doesn’t contain any chemicals that could affect your worms.
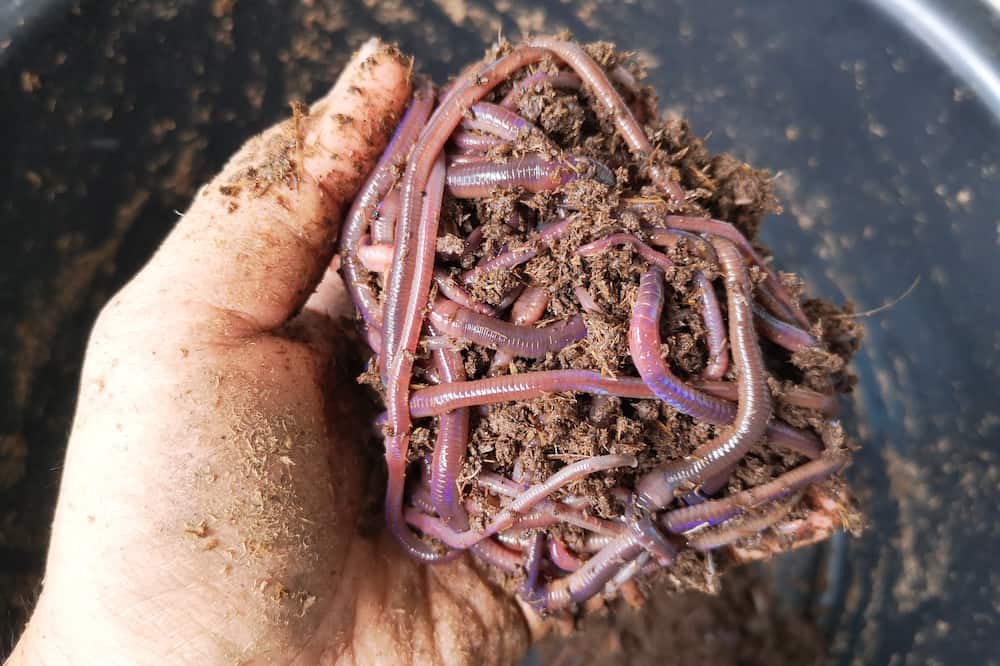
- Worms
Next, it’s time to source the stars of the show. Red wrigglers are the top choice for composting, as they consume waste very quickly.
- Food Scraps Container
Using this container, you’ll collect the food waste from your kitchen to feed your worms. As worms do best when they’re left alone, you can collect your scraps and feed them every week.
DIY Worm Farming in Easy Steps
With all of your materials and tools, you can now begin working on your DIY worm farming project by these easy steps.
Step 1: Prepare the Worm Bins
Using your drill and the one-inch bit, drill one hole two inches from the rim of your tallest bin. Then, drill another one-inch hole on the opposite side, followed by four 1/8” holes at the bottom.
The 1/8” holes should be placed near the bottom corners, as this will allow the worm tea to seep through.
After you’ve finished drilling, cut small pieces of your screening material and glue it in place, ensuring they are secure. You can then take the tall bin and put it inside of the short container.
Step 2: Prepare the Worm Environment
It’s essential that your worms feel comfortable in their environment; otherwise, they’ll be too focused on escaping.
You’ll want to make sure they have a comfortably damp environment by combining shredded paper and soil. Then, use a spray bottle to mist the soil until it’s damp rather than wet.
Add the paper and soil mixture to your tall bin to sit three inches from the bottom.
Once this is done, you can add in your worms and allow them to acclimate to their new environment. It’s best if you leave them alone for one day before you begin to feed them.
Everything in the bin should be very moist, but not to where puddles form in the soil.
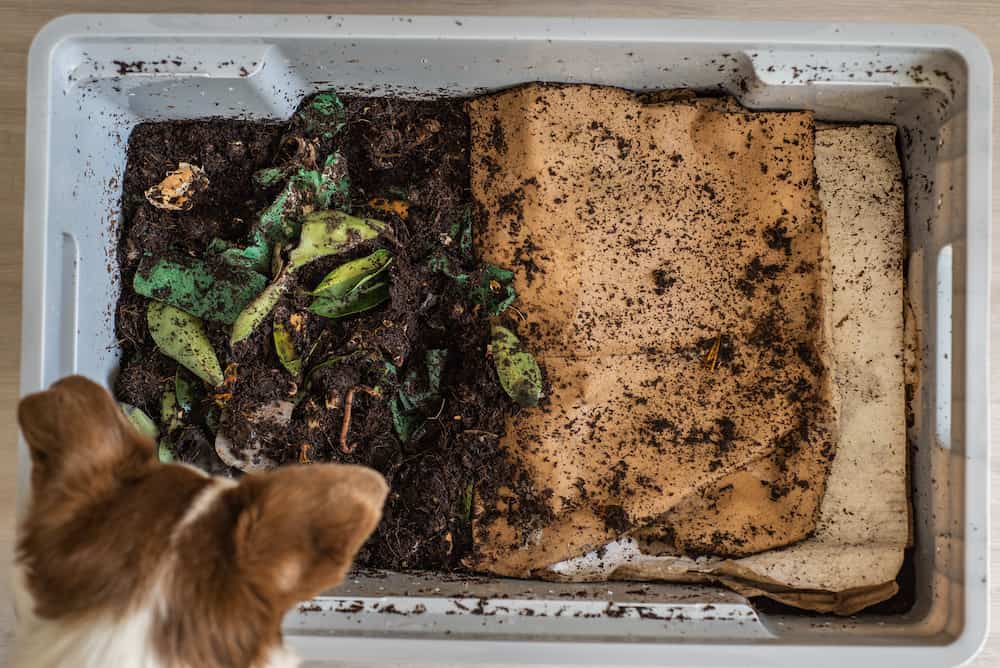
Step 3: Feed the Worms
There are many things that worms love to eat, such as coffee grounds, cereal, bread, fruit scraps, and vegetable scraps.
Collect all of these ingredients in a container to prepare for your weekly feedings. You can use your hand or trowel to make a hole in the shredded paper for you to add the scraps.
Toss a little bit of extra shredded paper into the hole and then the scraps on top. Make sure you finish the hole by covering it with more dirt and moist shredded paper to avoid fruit flies.
Do not add animal by-products, stems, or any dry pieces of food. These ingredients take much longer for worms to process, delaying fertilizer production.
Over the next few days, you’ll want to make a note of what ingredients your worms are eating. You can remove scraps that have been sitting around for a while.
Step 4: Worm Farm Maintenance
Even though worm farms are relatively autonomous, you will need to do a little bit of maintenance. Be sure to keep the bedding covered by changing out the newspaper every so often.
You’ll have to collect worm tea every few months and use it as a fertilizer or sell it. It’s also vital that you watch for when the worm bin has been filled with compost.
To safely collect your compost, decide which side of the bin you want to collect from first.
During your next feeding, place your scraps on the opposite side, which will draw your worms away. You can then use your hands to scoop out the compost gently.
Are Worm Farms Cruel?
It’s hard to imagine that worm farms are cruel, as you’re using natural fertilizer production methods. However, some groups suggest not allowing worms to roam free could be less than beneficial.
How Worm Farms Aren’t Vegan
If you follow the strictest definition of ethical farming, you might find worm farms aren’t the best choice. Some things to consider include:
Your Workforce
In worm farms, the worms are working for you, which means they’re being used for labor. Some individuals believe that this is exploiting the nature of worms, which makes it unethical.
You might also find that containing the worms to a small environment could be cruel.
Non-Vegan Containers
When designing your worm farm, you’ll have to use plastic as the material for your containers. The strictest eco-friendly farmers reduce their environmental impact by avoiding non-sustainable products.
Plastic has significantly impacted many animal kingdoms, including marine life.
Natural Habitat Removal
If you take worms out of their natural habitat and into your DIY farm, are worm farms cruel? This is another reason you some people find worm farming cruel.
Why You Should Own a Worm Farm
Deciding to design a worm farm can prove to be an exceptional benefit for many households. With a little bit of space and a few or lots of worms, you can get started.
Depending on your ethical views, you might find that worm farms couldn’t be explicitly considered vegan.
How Worm Farms Are Vegan
In the general definition of veganism, worm farms don’t require the use of animal products or by-products to be efficient. The food you feed them are from fruits and vegetables such as peels, stems, cores, and any rotten produce.
You’ll be giving back to the environment while reducing your footprint.
Whether you want to use them to enrich your garden beds and plants or set up a worm farm to sell worms, there are many benefits. It’s also relatively simple to set up and maintain, even for beginners. Perhaps best of all, it gives you the opportunity to repurpose foods such as potato peels, banana peels, and other parts of fruits and vegetables you don’t eat.
You can check your area for a Master Gardener composting class or use the steps above to start your own worm farm.
References:
Tea, Worm Tea, Anyone?