Here’s what to know about incubating chicken eggs whether you are a beginner or have some experience. Perhaps your hens are non-broody or maybe you want to buy fertile eggs to incubate yourself.
Eggs from non-broody chickens mean that incubating eggs has sometimes become the duty of the farmer instead of the hen. Alternatively, you may have purchased eggs with the plan to incubate them yourself.
Incubating Chicken Eggs in Four Steps
If you raise chickens, you may find yourself needing to know how to incubate chicken eggs. There’s something about being involved in the entire process that makes success more fulfilling.
Egg Float Test Method Of Checking Egg Freshness
Here are the proper steps to take when you plan to incubate chicken eggs:Step #1: Set Up the Incubator
The incubator’s automation level and the number of eggs it can accommodate are two factors that determine its price tag. There are models that range from fifty dollars to a hundred dollars and others that go up to the thousands, as in the case of high-end commercial incubators.
There are Grade-A incubators that can incubate chicks in about three weeks and DIY versions that can take much longer to hatch eggs.
Regardless of how advanced or basic your incubator is, it should accomplish the following:
- Achieve the right temperature
- Maintain the right humidity throughout the incubation period
- Be properly ventilated
DIY Incubators
If you’ve decided on a homemade version of an incubator, you may use a cheap styrofoam cooler for insulation. The device should also have an adjustable heating pad.
A bulb connected to a dimmer switch will do for the heat source, and a basin of water with a sponge will suffice for providing humidity.
DIYs aren’t far behind low-grade commercial incubators in terms of accommodation and automation, so they are still a good option if you aren’t after anything expensive. This is also a good option if you are looking for something disposable.
Less-Refined Incubators
It’s normal to be worried about how to incubate chicken eggs when you’re limited to working with less-refined versions of incubators.
First, you would need to work with a machine that has an excellent thermometer and hygrometer to measure both temperature and humidity levels accurately.
You can also opt for an incubator with a combination of these two instruments on an external display. In this way, you’ll know the conditions inside the incubator without needing to open the device constantly.
There are also models with auto-rotation features, which are specifically designed to imitate the way mother hens “fuss” over their clutch of eggs.
Depending on the device, this can come in the form of stand-alone egg turners or built-in ones.
Whatever type of incubator you have, though, make sure to place it in a location that’s unlikely to go through temperature and humidity fluctuations.
Step #2: Collect the Fertile Eggs
You should have less to be concerned about regarding how to hatch chicken eggs when you incubate fertile ones. If you have a healthy rooster among your flock, it’s highly likely for most of your eggs to be fertile. You would need to look at how big, clean, and well-formed the eggs are before placing them inside the machine.
Also, never clean the eggs yourself because it could ruin the coating vital to the embryo, but always make sure your hands are clean, and you’re as gentle as possible when handling the eggs.
Eggs are especially susceptible to damage, particularly from sudden movements.
Step #3: Incubate
On average, it usually takes about three weeks for an egg to hatch once the incubation begins. To ensure you’re incubating the eggs correctly and you complete the process, here are the things you need to do:
1. Check and Maintain Proper Humidity and Temperature Levels
Before positioning the eggs in the machine or incubator, make sure to power it on and measure the humidity and temperature over 24 hours. Make the necessary adjustments to create the ideal environment. If the humidity isn’t quite right, you may use a sponge with a smaller or bigger surface area to adjust it correctly.
You can then either lower or raise the temperature in small increments until it reads 99.5 degrees Fahrenheit.
Once you’ve created the optimal environment inside the incubator, your concern should only be to maintain it until the chicks hatch.
After you place the eggs inside the incubator, close the door and inspect the temperature and humidity levels regularly.
At times, you may need to place additional water in the pan to get the humidity right. During day 18, especially, make sure to add more water to turn up the humidity levels.
2. Turn the Eggs
If your device doesn’t include a self-turning feature that mimics the mother hen’s “fussing”, you need to turn the eggs yourself.
Here’s the right way to do it:
- Mark the eggs’ opposite sides, preferably with an “X” and an “O” to keep track of the turned eggs.
- Turn the eggs at least three times in a day. Always go for an odd number in terms of the number of times you turn. Go for five or seven times so that the eggs never rest in the same position for two nights in a row.
- Alternate the direction of turns since varying the position of the embryo should always be the goal.
- The 18th day should be the last day you turn the eggs. After that, you must no longer touch them.
On day 19, the yolk begins to enter the body cavity. Then on day 20, the yolk sac is drawn into body cavity completely. This is when the embryo occupies most all of the space inside the egg with the exception of the air cell.
- How to incubate chicken eggs
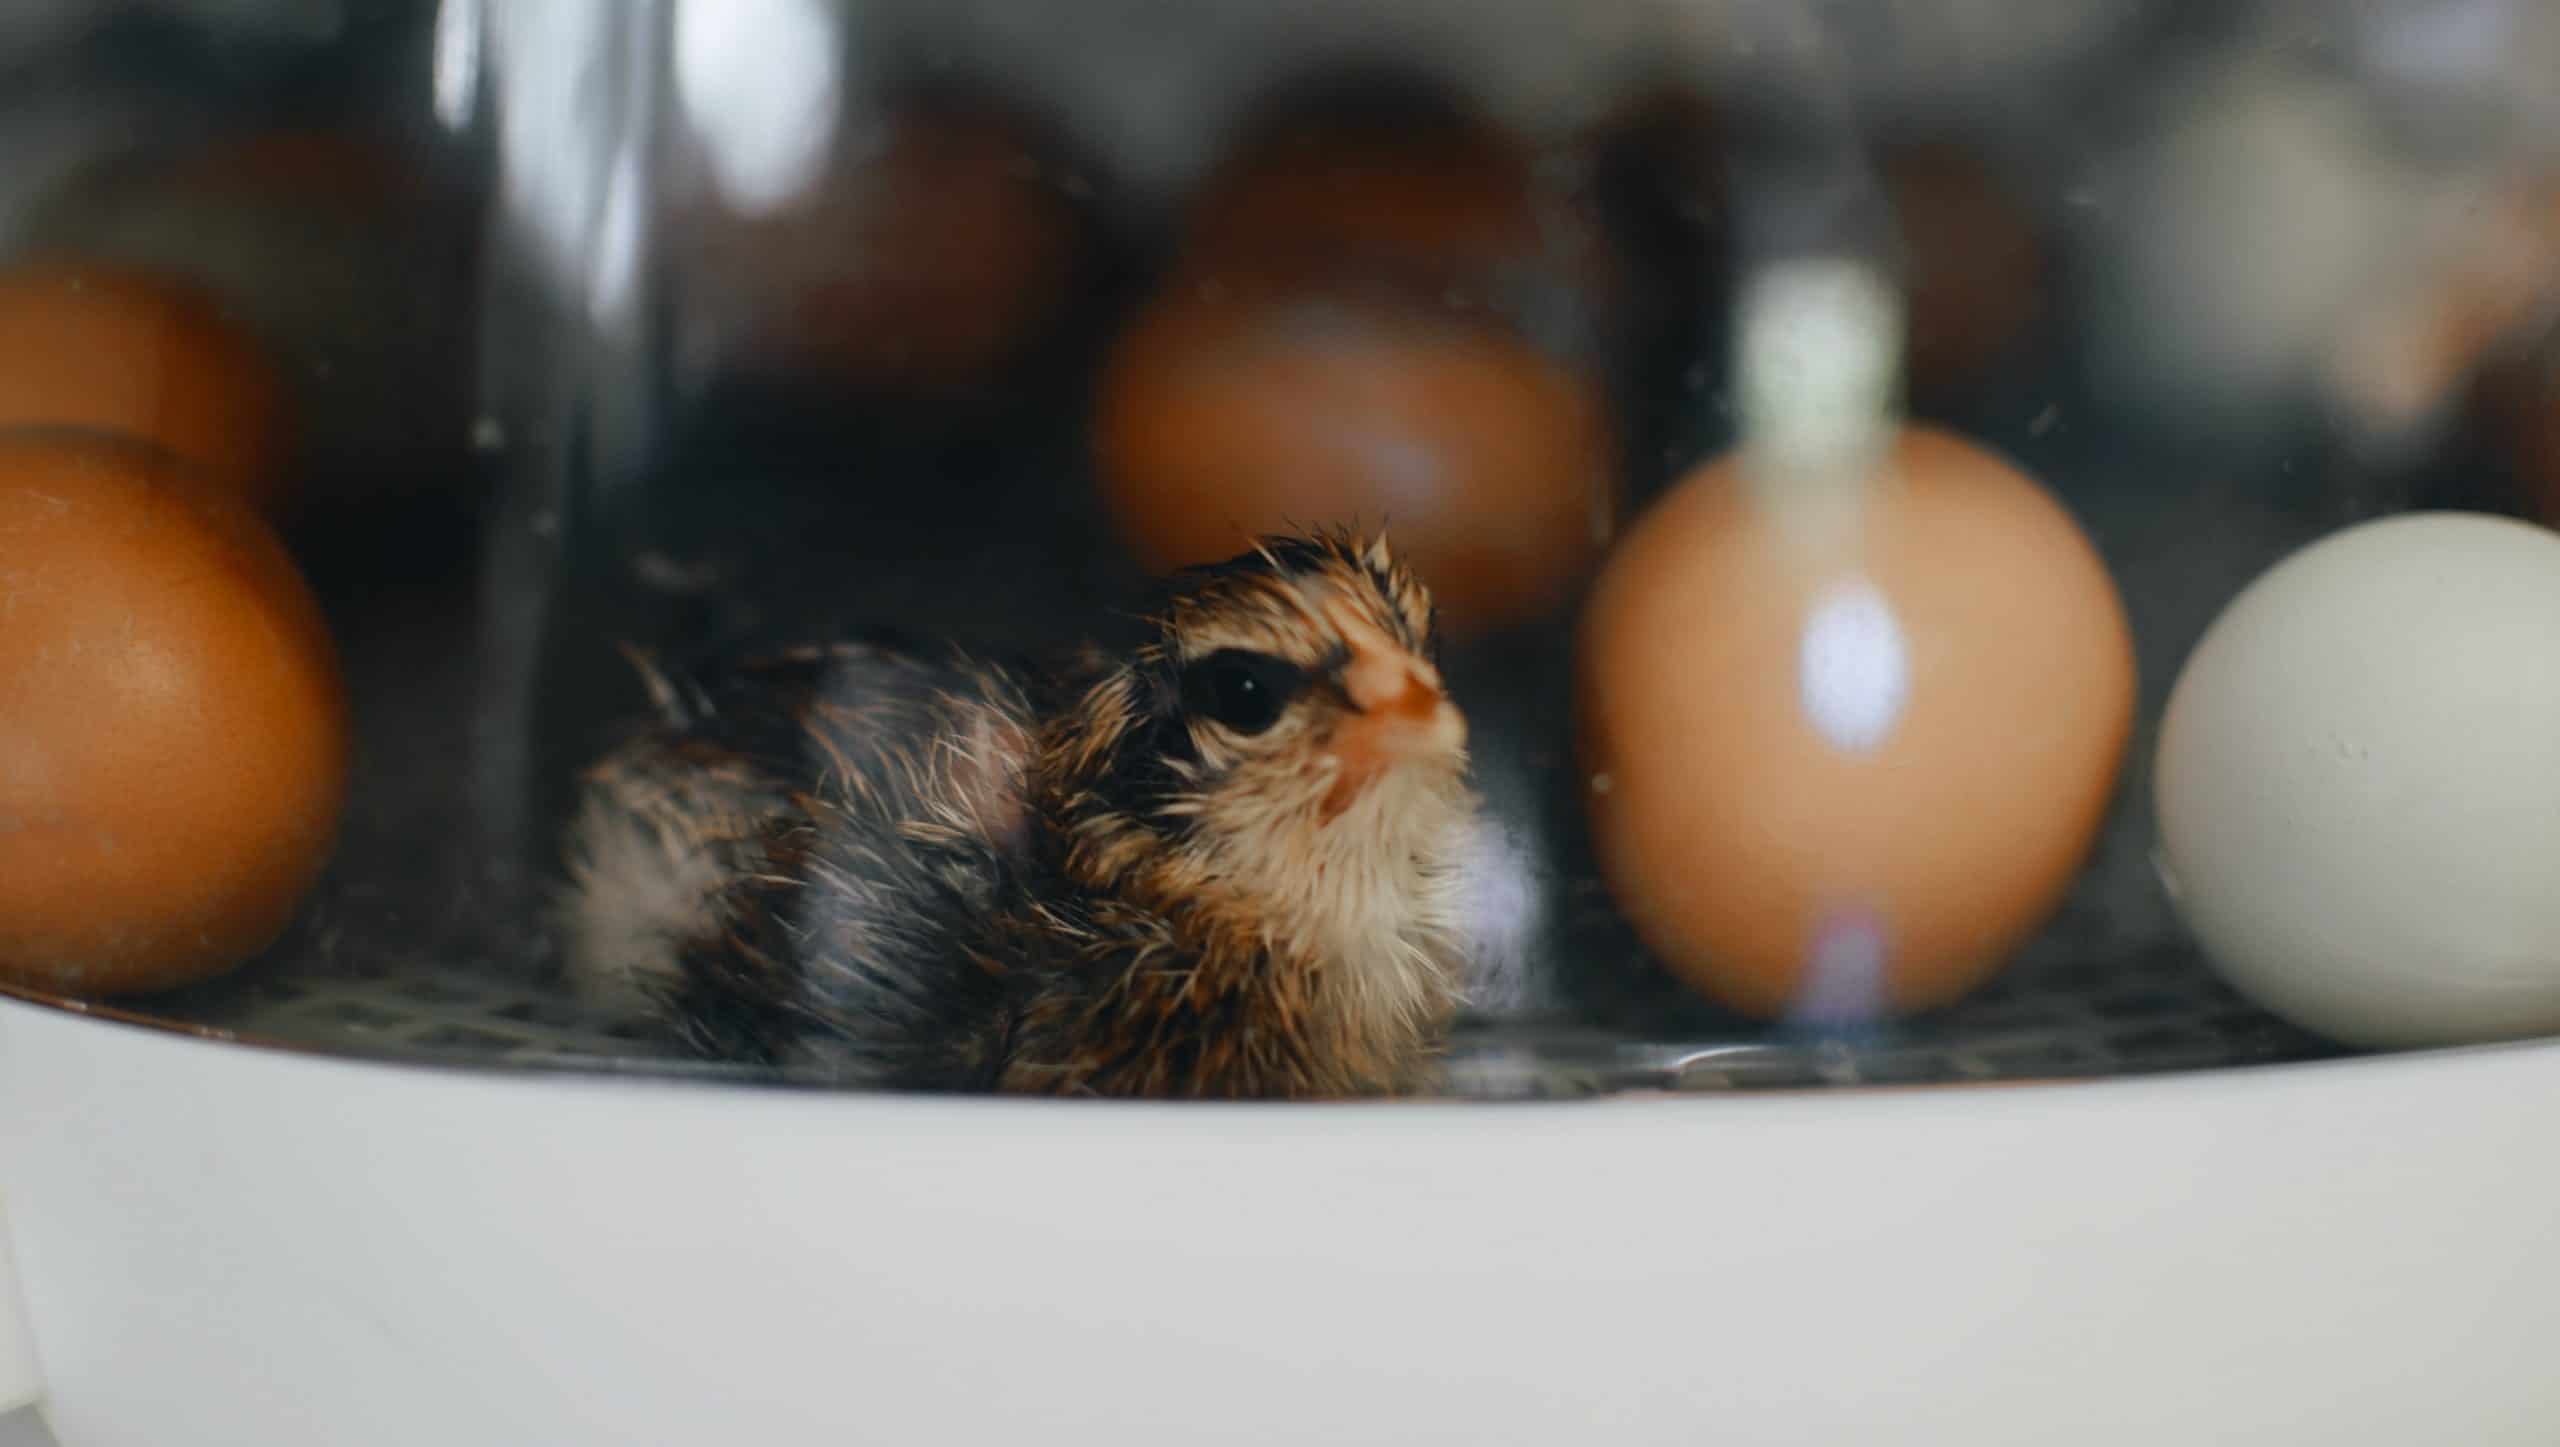
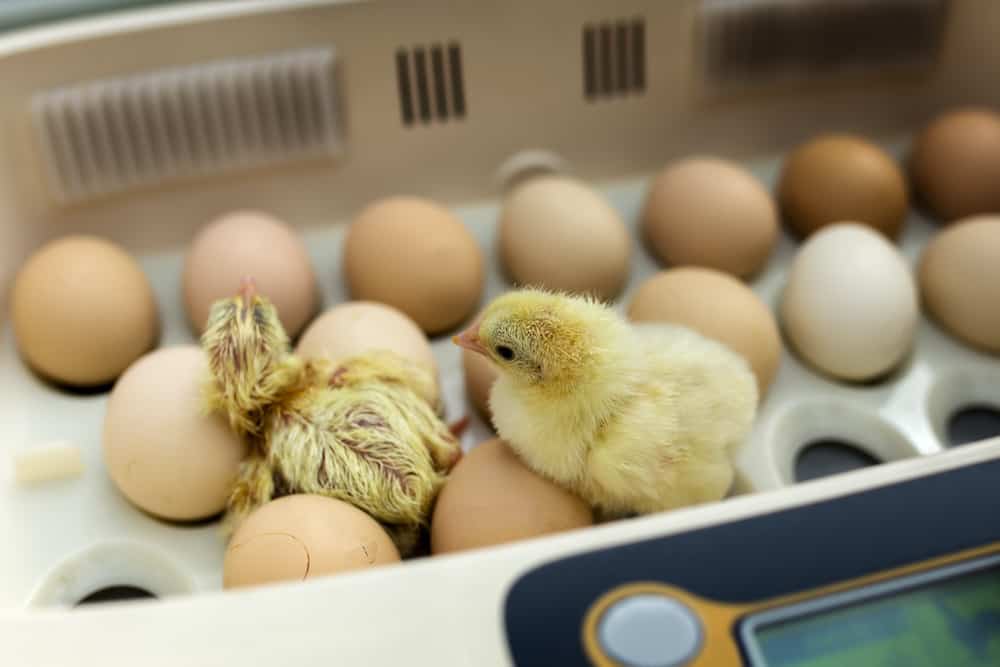
Step #4: Hatching
A huge part of how to hatch chicken eggs is letting them hatch on their own. As much as possible, you should never interfere with this part of the process; otherwise, you might injure the chick. During the last days before hatching, you’ll start to notice the eggs constantly shifting from the fetuses getting active.
If all goes well, the chick inside will eventually peck a hole in the egg with its beak. After taking its first breath, the chick may rest from six to 12 hours to adjust its lungs before it continues with the hatching process.
As soon as the chick has freed itself from the egg, let it first dry off inside the incubator before transferring it to the brooder, where it will spend its first few weeks of life. What to Feed Baby Chickens
FAQs about Incubating Eggs
From temperature and humidity to rotating and chicken egg incubation times, there is a lot to do when you are in charge of the brooding.
These are common questions about incubating chicken eggs. It’s best to review them before you start the incubation process. Refer back when necessary as questions arise.
1. How Do You Prepare Eggs for Incubation?
A significant part of the preparatory process involves making sure you have fertile eggs to incubate. If the eggs come from your flock, this means you need to have a rooster. If you’re simply acquiring eggs from another individual, then, at the very least, make sure this person is a farmer who lives nearby.
Keep in mind that the closer your egg sources are to home, the better and more fertile their eggs are likely to be. The transportation process can bring about temperature, humidity, and jostling issues that could be detrimental to the developing fetus.
On the other hand, the hatching rate increases to about 90 percent when eggs come straight from your coop. Eggs should be clean, well-formed, and of full-size before you place them inside an incubator. Also, as mentioned, never attempt to clean the egg’s surface, your hands have to be clean, and you must be gentle as possible when handling the eggs.
2. What Is the Ideal Temperature for Incubating Chicken Eggs?
As noted earlier, while setting up the incubator, you need to let it run for 24 hours. You must also measure the temperature and humidity and adjust as necessary before positioning the eggs inside.
You may either raise or lower the temperature in small increments until the thermometer displays a reading of 99.5 degrees Fahrenheit. Keep in mind that a degree higher or lower than 99.5 degrees can kill the embryo and prevent the eggs from hatching.
In the same way, you must also maintain a humidity level of 40 to 50 until the 18th day of incubation. Then, during the final days before the eggs hatch, you should go for a 65 to 75 humidity level.
Ventilation is also vital for developing fetuses. Eggshells are made of a porous material that allows for the entrance of oxygen and the exit of carbon dioxide.
Although commercial incubators already have holes in them for air circulation, you need to make sure your DIY version also has them to help the fetuses breathe.
3. Can You Put Eggs in the Incubator at Different Times?
Ideally, once the eggs are fertile, you should have them transferred to the incubator right away. In case your device can only accommodate a certain number of eggs, you may opt to store the rest in egg cartons, with the fat sides pointed upward to keep the embryos alive.
Keep these eggs in conditions between 50 and 60 degrees Fahrenheit and at a humidity level of 75 to delay the development of the embryos for 10 days while still keeping them viable.
Yes, you can place the eggs inside the incubator at varying times, given that the eggs are stored accordingly, and their placement falls within the 10-day viability period. Otherwise, you may need to purchase a new incubator.
4. How Long Can Eggs Sit Before Putting Them in an Incubator?
Chicken egg incubation times average about three weeks or 21 days, so, as much as possible, you don’t want to let your eggs sit once they’re fertile. You’ll want to place them directly inside the incubator and start the incubating process immediately.
However, this isn’t always possible if you’re handling several clutches of eggs and are only working with a low-grade commercial incubator or a DIY model.
In such cases, you need to store the eggs in cartons with the fatty sides positioned upwards in order to protect the embryo.
Make sure you store the eggs in a room where the temperature is usually around the 50 to 60 degrees Fahrenheit mark, and the humidity is at a level 75. This should delay the development of the eggs for 10 days while maintaining the viability of the embryos.
How Long Do Fresh Eggs Last: Food Safety 101
5. How Long Does It Take to Hatch Eggs?
It takes 21 days to hatch eggs. Every day is important in the process. In the first day, there is the beginning formation of the nervous system, head, and eyes. By day three, the nose, wings, and legs start to form. The beak forms on day 6.
Reasons to Incubate Eggs from Your Hens
For most chicken breeds, mothering instincts are a driving force when birthing and raising an offspring. As soon as a young hen lays a batch of eggs, instinct will direct her to adjust them constantly and never to leave her nesting box.
Motherhood is incredibly crucial for a hen, so much so that in the event she falls short, her chicks may never hatch. Or worse, they may come into the world with health issues or deformities.
We have since found out, though, that modern hens don’t always excel at motherhood. Whether this stems from something cultural or genetic, mother chickens often get distracted, get ousted from their nests, or would rather not than take care of her eggs.
In addition, some breeds, like Polish chickens, tend to be non-broody.
How to incubate chicken eggs
Incubating chicken eggs isn’t for everyone. It’s a careful process that has to mimic the ways of Mother Nature. Otherwise, you risk the situation becoming disastrous for your eggs.
It would take careful planning, proper research, and the right equipment on your end to get things right and to ensure success. As such, many prefer to purchase newborn chicks and save themselves the hassle of incubation and hatching eggs. That said, there’s always something to be said about having complete involvement in a venture’s success.
Of course, raising baby chicks to adulthood is a success in itself, but it’s even more fulfilling raising them from their earliest form of development.
Whether you do it with the help of a DIY version, a low-grade commercial model, or a Grade-A incubator, you can achieve the optimal environment and succeed.
Just make sure the temperature and humidity levels are just right, and proper ventilation is provided to let the developing embryos breathe.
You must also make it a point only to incubate eggs that are clean, well-formed, and fully developed. Lastly, you can increase the hatching success rate by not cleaning the surface of the egg yourself and risk damaging the vital coating.
As your chickens grow into adulthood, be sure to keep them warm in cold weather. Learn how cold can chickens tolerate.