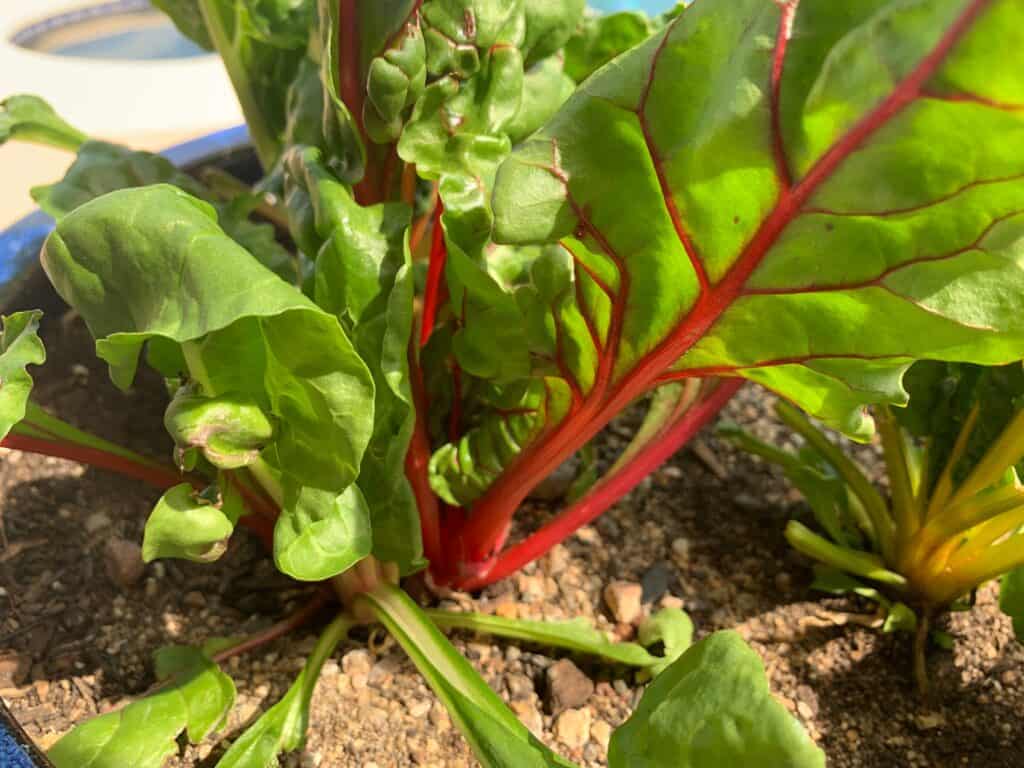
Growing Swiss chard is easy when you do it the right way. Swiss chard is typically grown as a cool-season crop that thrives in cool temperatures and tolerates frost. Swiss chard can grow back after you cut it. It is a “cut and come again” crop.
You can harvest the outer leaves while leaving the inner leaves and the center growing point intact. This allows the plant to continue growing and producing more leaves you can pick throughout the season.
With the exception of cold regions, you can direct sow the seeds where you want them to grow. There is no need to plant in small containers and then transplant.
Whether you want to grow Swiss chard in a garden bed or containers, here’s what you need to know to be successful growing Swiss chard.
When to Plant Swiss Chard Seeds for Your Climate
When you plant Swiss chard seeds depends on your region’s climate and hardiness zone. Check what your plant hardiness zone is before planting. Swiss chard will grow in zones 3 – 10; it’s a resilient crop.
Swiss chard requires a minimum soil temperature of 40°F. The ground needs to be warm enough for the seeds to germinate. Use a soil thermometer to check the temperature before planting. (You can also use a food thermometer and use it only for gardening.)
It grows well when air temperatures are 50 – 75°F. Here is a breakdown for different growing zones so you can learn when it’s best to plant Swiss chard seeds:
Growing Swiss chard in USDA Hardiness Zones 3a and 3b
Swiss chard can be planted in early spring or late summer for a fall crop. For spring planting, sow seeds directly in the ground 2 – 4 weeks before the last expected frost date. For fall planting, plant seeds 8 – 10 weeks before the first expected frost date. Swiss chard prefers cooler temperatures and can withstand light frosts.
Sowing Swiss chard seeds in USDA Hardiness Zones 5a and 5b
In these moderate regions, Swiss chard seeds can be planted directly into the ground 2 – 4 weeks before the last expected frost date in spring. You can also plant seeds in late summer for a fall harvest.
Planting Swiss chard in USDA Hardiness Zones 8a and 8b
In these warm regions, Swiss chard seeds can be planted in the fall and winter for a winter harvest. Sow the seeds directly into the ground in early fall, 8 – 10 weeks before the first expected frost. You can also plant Swiss chard in late winter for a spring harvest.
Growing Swiss chard in USDA Hardiness Zones 9a and 9b
In hot regions, Swiss chard can be grown as a winter crop. Plant seeds in late fall to early winter, about 6 – 8 weeks before the first expected frost. You can also plant in January and February as well. Ensuring the soil moist during germination is crucial for success in all regions but especially in these hotter, drier areas.
The Right Soil
While it’s one of the easiest vegetables to grow, when it comes to growing Swiss chard from seed, nutritious soil will help ensure successful germination and growth. Swiss chard prefers soil that is:
- Well-draining
- Rich in organic matter
- Slightly acidic to neutral pH level
To prepare the soil for planting Swiss chard, amend the soil with compost or well-rotted manure. These amendments will help to increase the soil’s organic matter content, improve soil structure, and provide essential nutrients for growth.
It is also important to ensure the soil is well-drained to prevent waterlogged conditions which can lead to root rot. Incorporating perlite, vermiculite, or coarse sand can improve drainage in heavy soils.
According to the University of Minnesota Extension, the ideal soil pH for growing leafy greens is between 6.0 and 6.5. This slightly acidic to neutral pH level allows for proper nutrient uptake and plant growth.
I don’t usually check my soil’s pH level. Each growing season I amend the existing soil with new organic soil, and equal parts compost, peat moss, and vermiculite. My garden grows really well when I amend the soil this way. (I stopped buying organic raised bed mix because the brand I had been buying had an abundance of wood chips and also lots of little plastic pieces.)
Overall, using soil with the proper pH level and amending it with organic matter can greatly improve the chances of successful Swiss chard growth.
How to Grow Swiss Chard
Now that you know the time of year and the type of soil to use, you’ll need to consider where to plant it. When choosing a spot to plant Swiss chard, look for a location with full sun. Swiss chard requires at least 6 hours of direct sunlight each day.
By following these steps, you can grow Swiss chard successfully in different settings and enjoy its delicious and nutritious leaves all season long.
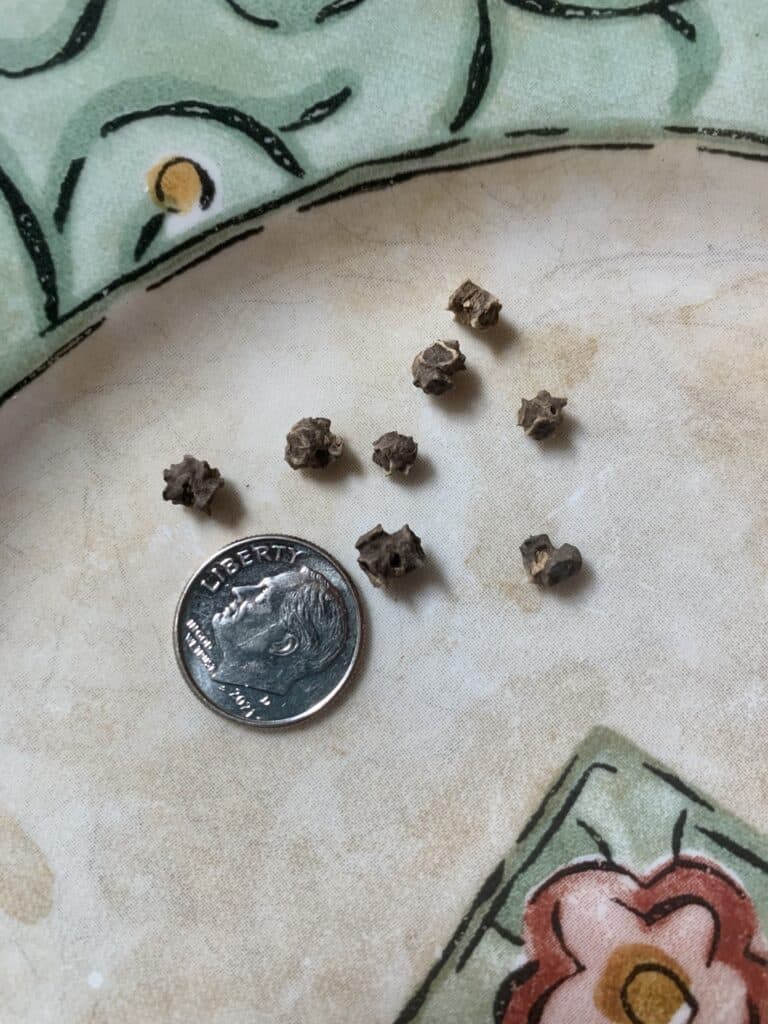
NOTE: Soak Swiss chard seeds for 24 hours in a small cup or jar of water before planting to speed germination. This step is not necessary but will help speed germination. Swiss chard seeds are fairly large so they are easy to handle when they are wet unlike seeds from other leafy greens such as lettuce, etc.
How to grow Swiss chard in garden bed in rows or with companion plants
- Soak seeds for up to 24 hours (optional to speed up germination).
- Choose a sunny location in your garden bed, ideally one that receives at least six hours of direct sunlight per day.
- Prepare the soil by removing any weeds or rocks and adding compost or aged manure to improve the soil’s fertility and drainage.
- Plant Swiss chard seeds in each hole about ½ inch deep and 2 – 3 inches apart in rows that are spaced 12 – 18 inches apart. Sow 2 seeds per hole.
- Water the seeds well, and keep the soil consistently moist throughout germination.
- Once the seedlings are about 2 inches tall, thin them out to leave 6 – 12 inches of space between plants, depending on the variety’s size.
- Consider planting companion plants to keep pests away.
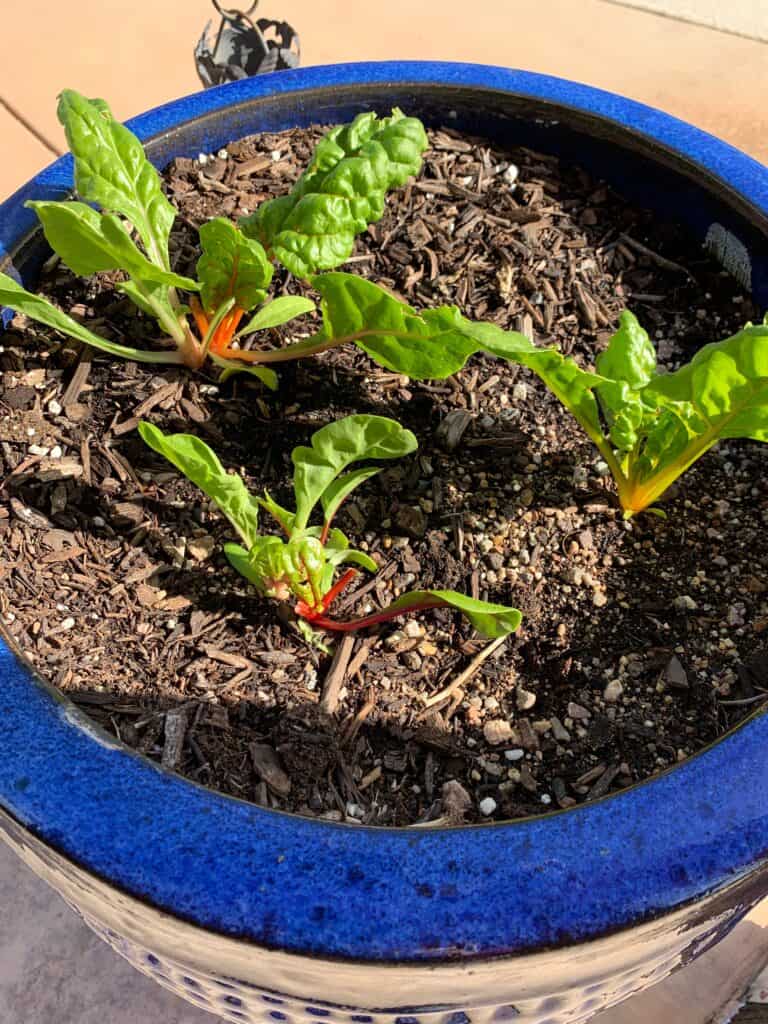
How to grow Swiss chard in containers
- Soak seeds for up to 24 hours.
- Choose a large container that is at least 12 inches deep and 12 inches wide and has drainage holes at the bottom. You can grow four Swiss chard plants in a 12×12 space. If your container is smaller, plant fewer seeds.
- Fill the container with a high-quality potting mix.
- Plant Swiss chard seeds about ½ inch deep and 2 – 3 inches apart. Plant two seeds in each hole.
- Water the seeds well, and keep the soil consistently moist throughout the growing season.
- Once the seedlings are about 2 inches tall, thin them out to leave 6 – 12 inches of space between plants, depending on the variety’s size.
- Consider moving the container to a location with partial shade during the hottest parts of the day to prevent the plants from drying out.
Planting Swiss chard seeds using square foot gardening
You can grow four Swiss chard plants in one square foot of space. You can buy a square foot gardening square or just plant four seeds in a one square foot space.
- Soak seeds before planting to speed germination.
- Choose a raised bed or a garden plot that is at least 2 feet wide and 4 feet long.
- Fill with high-quality soil mix that contains compost, peat moss, and vermiculite.
- Divide the bed into 1-foot sections and mark each square with string or stakes.
- Plant Swiss chard seeds four inches apart in each square, about ½ inch deep.
- Only plant one seed per hole. This means four seeds in each square foot. There is no need for thinning.
- Water the seeds well.
- Consider planting companion plants in some of the other squares to repel pests.
Swiss Chard Companion Plants
Planting Swiss chard with certain plants can help deter pests, improve soil health, and even enhance the flavor of the Swiss chard. Companion plants for Swiss chard include cabbage, turnips, collard greens, and herbs such as dill, mint, and sage.
Here are some recommended companion plants for Swiss chard:
- Turnips
- Brussels sprouts
- Cabbage
- Dill: Atttracts beneficial insects such as ladybugs and lacewings, which prey on Swiss chard pests like aphids and spider mites.
- Mint: Mint repels pests such as flea beetles and ants that can damage Swiss chard.
- Sage: Sage has antimicrobial properties that can help prevent fungal diseases in Swiss chard.
- Beans: Beans add nitrogen to the soil, which can benefit Swiss chard growth according to University of Minnesota Extension.
By planting these companion plants alongside Swiss chard, you can create a more balanced and diverse garden ecosystem.
Caring for Swiss Chard
Be sure to water frequently after sowing the seeds. The soil should remain moist. Be gentle when watering so you don’t unearth the seeds. Soaking seeds prior to sowing will help speed up germination times.
Once Swiss chard leaves appear, water approximately one inch per week. Take care to not get the leaves or stem wet when watering. Also, note rainfall so you don’t overwater. In dry climates, such as USDA hardiness zone 9b, you may need to water more frequently.
Be sure to regularly weed the area and to keep an eye out for pests.
Swiss Chard Pests and Diseases
Swiss chard is a hardy and nutritious vegetable, but it can be susceptible to pests and diseases. Here is some information on common pests and diseases that affect Swiss chard, as well as how to prevent and treat them using organic methods.
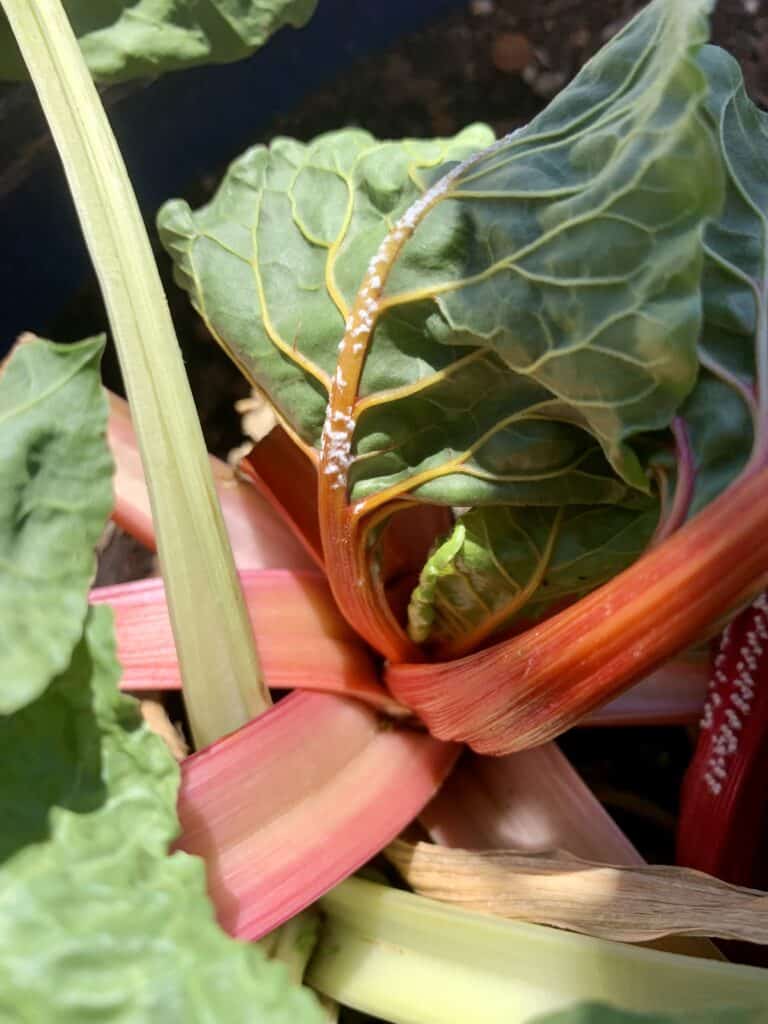
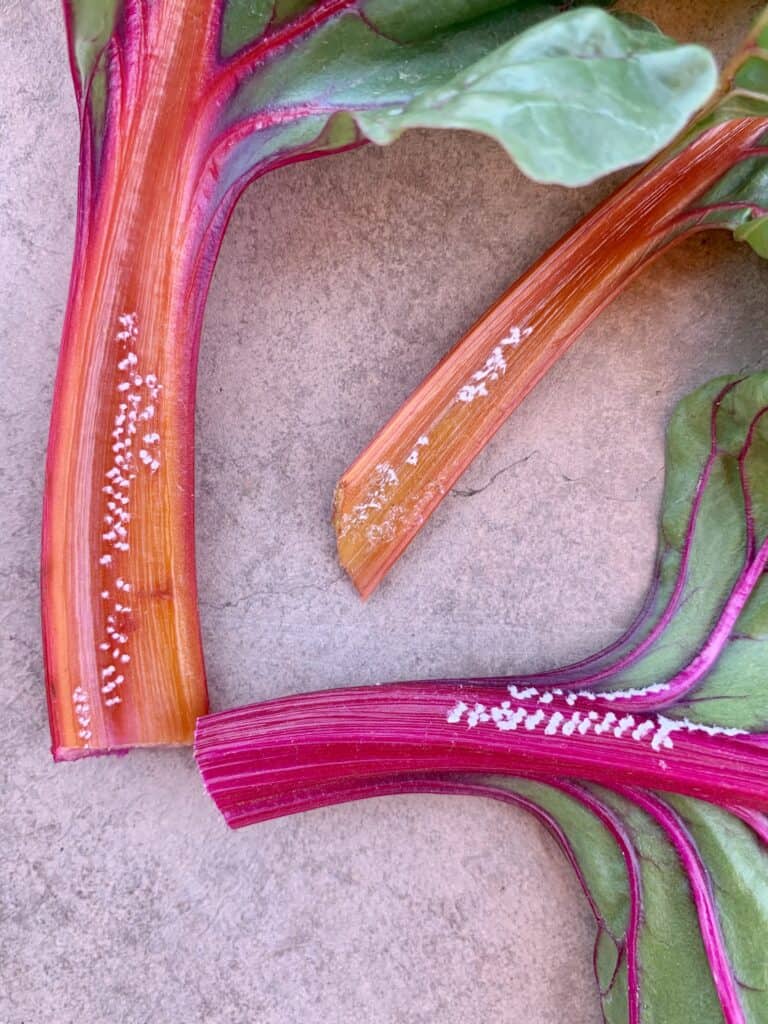
- Aphids: Aphids are small, soft-bodied insects that can cause stunted growth and distorted leaves.
- Flea beetles: These small, black beetles can chew tiny holes in the leaves, causing them to turn brown and die.
- Cutworms: These caterpillars can cut off young seedlings at the soil level not allowing plants to thrive.
- Slugs and snails: They can eat holes in the leaves and leave a trail of slime behind.
Identifying and Treating Diseases
- Downy mildew: This fungal disease can cause yellowing and wilting of the leaves. To treat, remove infected leaves and increase air circulation around the plants.
- Leaf spot: This fungal disease causes circular brown spots on the leaves. To treat, remove infected leaves and avoid watering the leaves.
- Root rot: This fungal disease can cause the roots to rot and the plants to wilt. To treat, remove infected plants and improve drainage in the soil.
How to Prevent Pest Infestations
- Pull weeds to eliminate hiding places for pests.
- Plant Swiss chard in containers.
- Rotate crops: Plant Swiss chard in a different area of the garden each year to reduce the buildup of pest populations in the soil.
- Use row covers: Cover Swiss chard plants with lightweight fabric to prevent pests from laying eggs on the leaves.
- Use companion planting.
Organic Pest and Disease Control Methods
- Neem oil: A natural insecticide that can be sprayed on plants to repel pests.
- Insecticidal soap: A soap-based spray that can kill aphids, mites, and other pests.
Be sure to contact the help desk at your local nursery or extension agent for advice on the best treatments for your specific area and situation.
When to Harvest Swiss Chard
Swiss chard takes 7 to 14 days to germinate, depending on the temperature and moisture levels. Once the seeds have sprouted, it takes around 50 to 60 days for the plants to reach maturity.
However, some varieties of swiss chard can take longer. Check the seed packet or plant label for the days to maturity (DTM) for the Swiss chard variety you plant.
After a few weeks, you can begin to harvest Swiss chard leaves. Be sure to snip the outer leaves.
How to Harvest Swiss Chard
Once the Swiss chard plants have 4 – 5 leaves, you can begin harvesting Swiss chard:
- Choose the largest outer leaves, and using scissors, small gardening sheers, or a knife, snip them off.
- Leave the center leaves intact. This will allow the plant to continue growing and producing more leaves.
- Do not remove all of the leaves.
- You can harvest young, tender leaves (about 2 – 3 inches) or wait until they are 5 – 6 inches.
If you plan to harvest the entire plant, wait until it reaches full maturity before doing so. This usually takes about 60 – 75 days after sowing. To remove the entire plant, use a sharp knife to cut it at soil level.
Swiss Chard Varieties
Growing Swiss chard at home means you get to choose what type to grow. Different types of Swiss chard have unique characteristics. Some varieties grow more quickly than others, and some are better suited for different climates.
Popular varieties include: Bright Lights, Fordhook Giant, Lucullus, Ruby Red, and Rhubarb Chard. Choose organic seeds when possible.
- Bright Lights is known for its bright and colorful stems, and it grows well in both warm and cool climates. It is beautiful to grow in containers and looks amazing in salads. DTM is 60 days.
- Fordhook Giant is a standard green Swiss chard variety that is easy to grow.
- Lucullus has dark green leaves with ivory stems. It does not bolt and is hot weather tolerant. It’s mild and tender. It matures in 60 days.
- Perpetual grows dark green leaves and looks a bit like spinach. It is ready to harvest in 50 days and is slow to bolt.
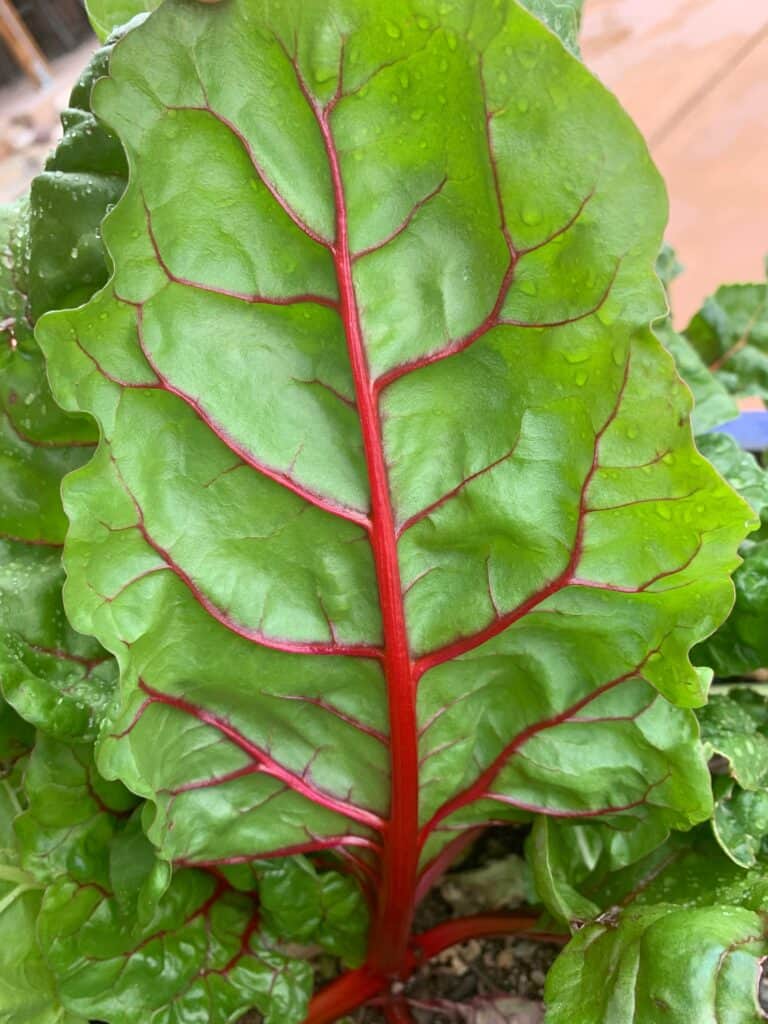
- Ruby Red has red stems and veins and is great for adding color to your garden and your plate.
- Rhubarb Chard has a red stem that resembles rhubarb and a mild flavor.
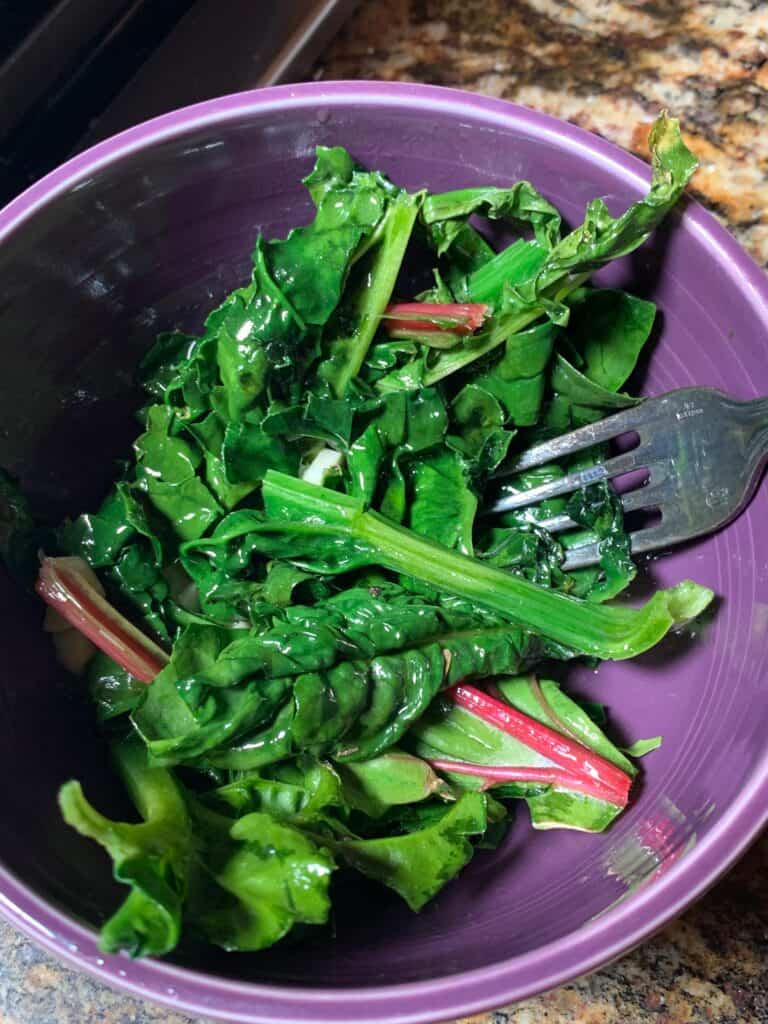
Using Swiss Chard
Swiss chard is a versatile leafy green that can be used in a variety of dishes. You can eat the leaves and stems raw, cooked, or sautéed. According to the University of Illinois Extension, Swiss chard is an excellent source of vitamins A, C, and K, as well as a good source of minerals such as potassium, magnesium, and iron.
Here are a few ideas for using Swiss chard in your meals:
- Add Swiss chard to salads. Bright lights will make a colorful addition.
- Sauté the leaves and stems with garlic and olive oil.
- Add Swiss chard to soups and stews.
- Use Swiss chard leaves as a substitute for tortillas in wraps.
- Make a Swiss chard and feta omelet for a delicious breakfast.
Growing Swiss Chard in Hydroponics
Hydroponics is a method of growing plants without soil, instead using nutrient-rich water solutions to deliver the necessary nutrients directly to the roots of the plants. This makes hydroponics an efficient and sustainable method of farming.
Swiss chard is a particularly good candidate for hydroponic growing because it has a shallow root system and doesn’t require a lot of space. It also has a relatively short growing period, making it ideal for hydroponic systems that can provide optimal growing conditions and support faster growth rates. Like most all leafy greens, it’s one of the best things to grow in hydroponics.
Several studies have shown Swiss chard grown in hydroponic systems can be just as nutritious as conventionally grown Swiss chard, and sometimes even more so due to the precise control over nutrient delivery in hydroponics.
Overall, growing Swiss chard in hydroponics can be an option especially in areas with limited space or poor soil quality.
FAQs
What is Swiss chard?
Swiss chard, Beta vulgaris var. cicla, is a leafy green vegetable that belongs to the same family as beets and spinach. Its large green leaves and colorful stems come in a variety of types such as Fordhook Giant, Bright Lights, and Ruby Red.
Swiss chard is commonly used raw in salads, soups, and stews. It can also be sautéed, steamed, or roasted. It’s easy to grow at home and can thrive in a variety of conditions, making it a popular choice for gardeners.
What can I do with Swiss chard from my garden?
Swiss chard is a versatile vegetable. Snip off the outer leaves and enjoy them raw in salads or as a wrap. You can cook it by sautéing, steaming, or boiling. It’s also a great addition to soups and stews. Freeze if you won’t be able to use it all.
How do you harvest Swiss chard so it grows back?
To harvest Swiss chard, use a sharp knife or scissors to cut the outer leaves off at the base of the plant, leaving the inner leaves intact. This will allow the plant to continue growing and producing new leaves. It is important not to cut off all the leaves at once, as this can stress the plant and reduce its productivity.
How many times can you harvest Swiss chard?
Swiss chard is a “cut and come again” vegetable, which means that it can be harvested multiple times throughout the growing season. With proper care, you can harvest Swiss chard up to 3 – 4 times during a single growing season. Whenever you cut some off, be sure to not remove all of the leaves. Leave some on the plant to encourage new growth.
When should I harvest Swiss chard?
Swiss chard can be harvested when the leaves are 3 – 4+ inches long, which typically takes around 30 – 40 days after planting. It is important to harvest the leaves before they become too large or tough, as this can negatively impact their flavor and texture. I harvest it right before I’m going to use it: as I’m preparing lunch or dinner.
How long does Swiss chard take to grow?
Swiss chard takes about 50 – 60 days to mature from seed and can be harvested as baby greens in as little as 25 – 30 days. Check the date to maturity (DTM) on the seed packet as each variety matures at different times.
Does Swiss chard come back every year?
Swiss chard is a biennial plant, but typically grown as an annual in most climate zones. It can self-seed and come back in subsequent years if allowed to go to seed. In moderate climates, it can grow year round if it’s not affected by freezing or consistently hot temperatures.
Does Swiss chard need full sun or shade?
Swiss chard grows best in full sun but can also tolerate partial shade. In my opinion, it’s one of the best winter vegetables to plant because you can grow it throughout the spring, and depending on your area and how hot it gets, into the summer months.
Does Swiss chard grow back after you cut it?
Yes, Swiss chard can grow back after it is cut if you keep caring for it and don’t cut it back too severely. I also don’t harvest every day from the same plant. I always wait at least three days.
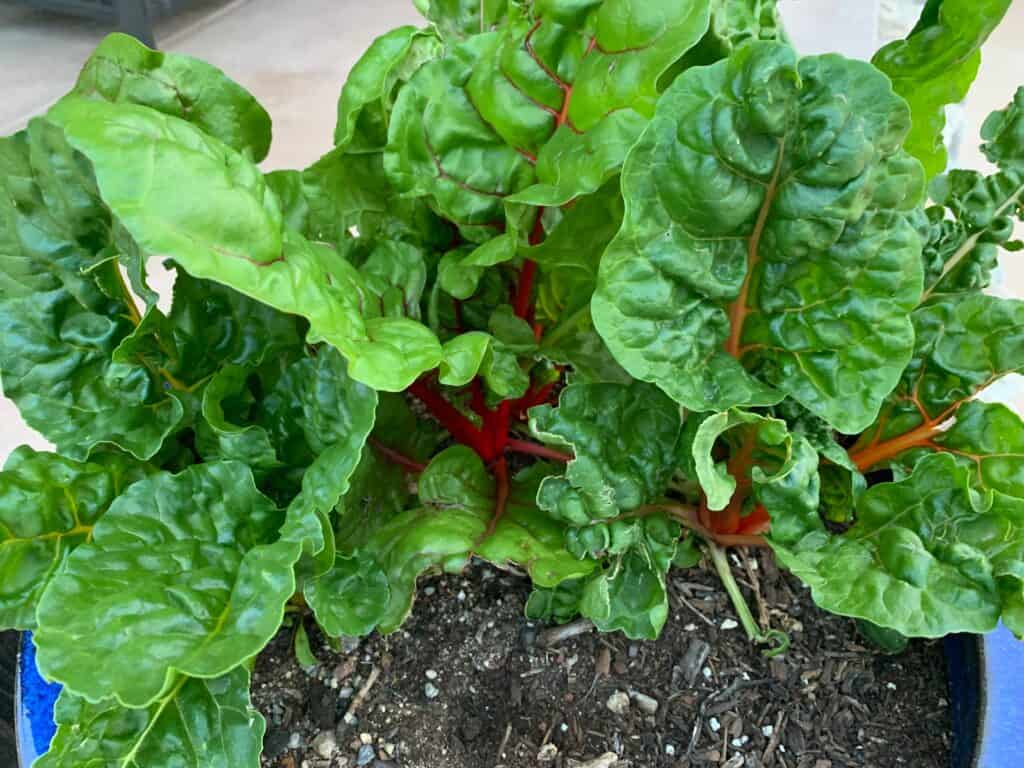
Can Swiss chard be grown in containers?
Yes, Swiss chard grows well in containers. It’s an ideal crop for container gardening because it has shallow roots and doesn’t require a lot of space.
Can you grow Swiss chard in hydroponics?
Yes, like most all leafy greens, Swiss chard usually grows well in hydroponic systems.
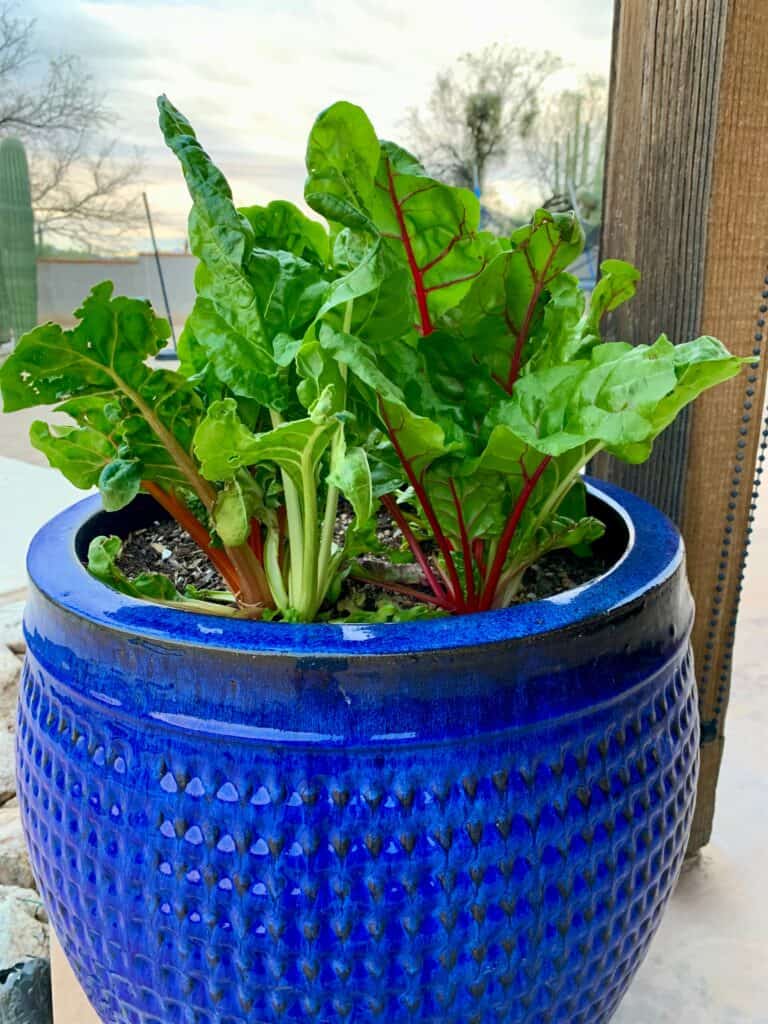
Homegrown Swiss Chard
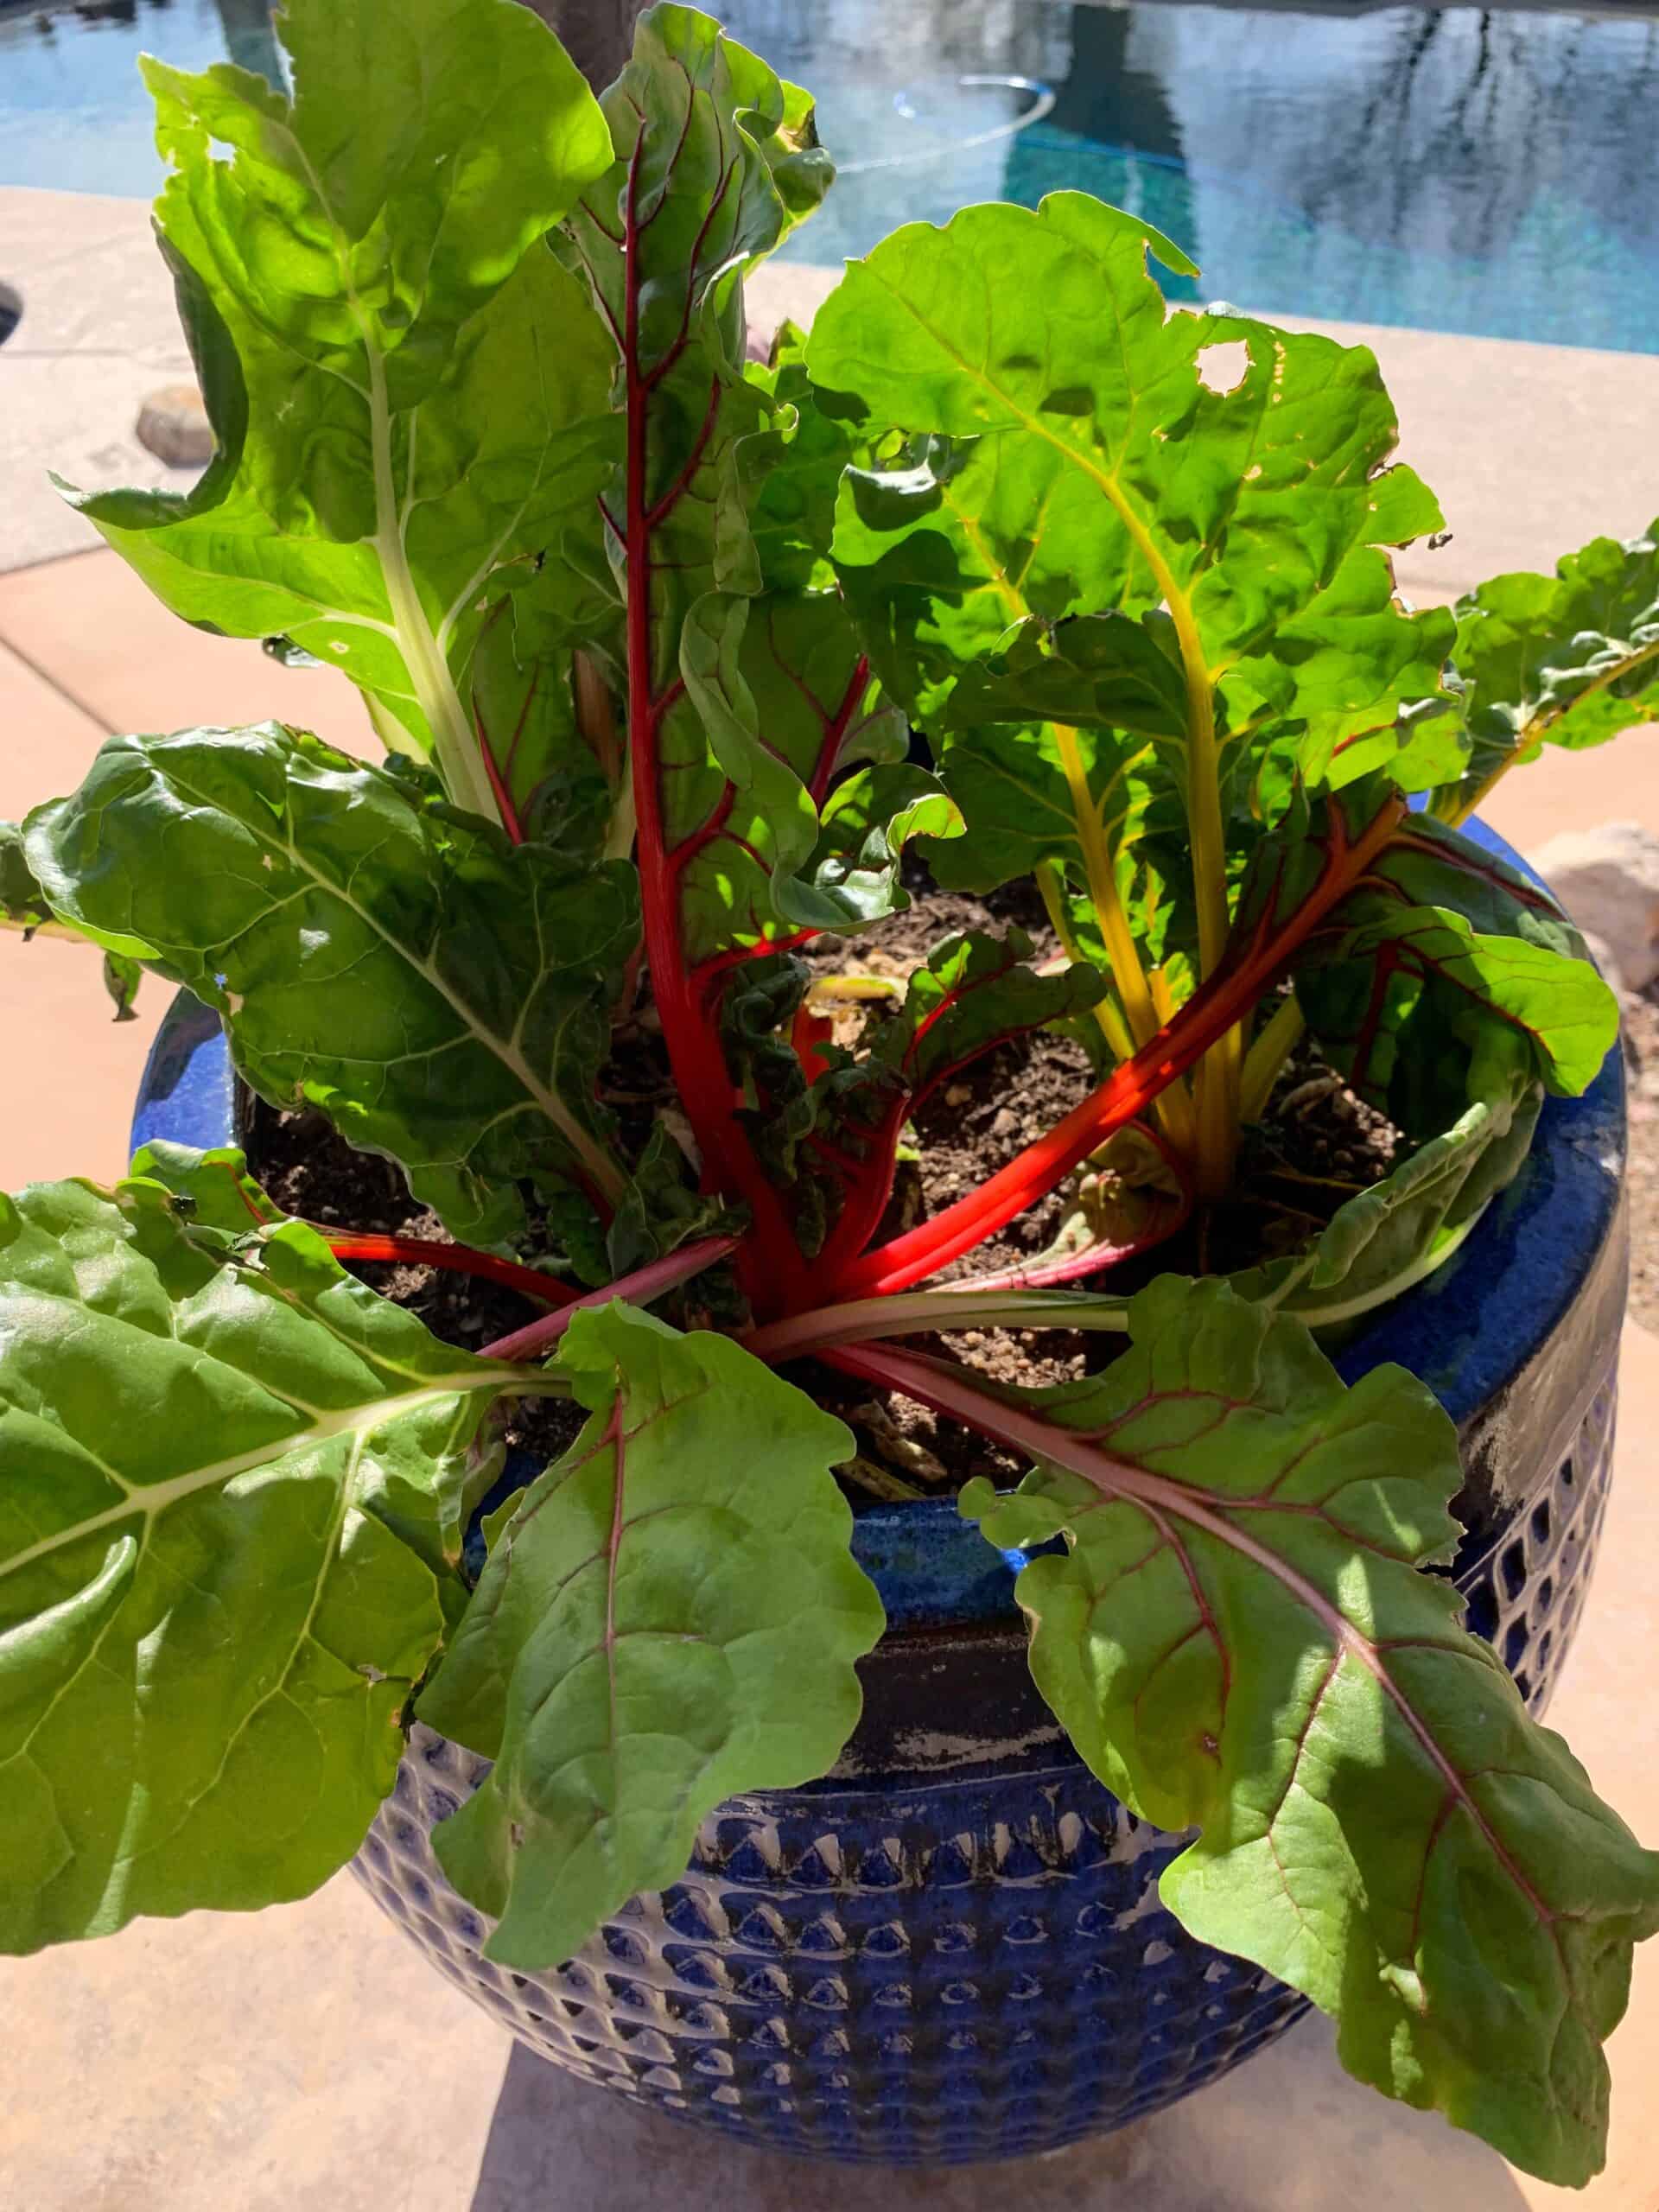
I’ve had great success growing Swiss chard in raised garden beds and in tall pots. There’s nothing like harvesting fresh leaves for a salad: It’s a true farm-to-table experience!
Start out with the best soil you have access to and can afford. Amend it with compost and organic matter. Choose organic Swiss chard seeds if you can. Remember to not plant Swiss chard seeds in the same place each year. This will help reduce chances for pests.
Learn more about growing vegetables at home: