How to Care for Orchids – You may look at an orchid and think you could never grow that. They look beautiful, but in truth, there is no reason to fear these magnificent plants. They are easy to care for as long as you understand the orchid species you have chosen and follow a few simple rules.
In this article we are going to get down to the roots of just how to care for your orchid and also give you some tips and techniques you can use to ensure that your orchid grows big and healthy, so that you can take advantage of the beautiful blooms and magnificent fragrances that come along with any orchid type you choose.
Basic Rules for Orchid Care
Though the final care routine will depend on the orchid itself, there are a few basic rules to follow that are universal.
Therefore, though there are a few types of orchids that are challenging, for the most part, orchids are great flowers to begin your gardening foray.
If you do it right, you could very easily be experiencing your first bloom faster than you may expect.
Then with consistent upkeep of your routine, you may be able to enjoy that bloom for months (some even bloom all year long).
So, here are the basics you can use no matter what:
Watering
The first thing we need to tell you is that you do not have to water these plants as much as most think.
The truth is the biggest culprit of orchid death when starting out is over watering!
Too much water can cause the orchids to rot and then in no time you will have one dead plant on your hands.
There are some great techniques you can use though:
Submersion
When you are growing your first orchid, you may notice that the orchid tends to live in a clear container with soil or bark surrounding it.
That is because the world itself grows in the air rather than soil.
This clear container is placed in a pot.
In this method, you take the orchid and submerge the root for about 10 -15 mins.
Once you’re done, let the contents dry out for like 5 mins before replacing the orchid in the holding pot and the pot it belongs in as a permanent home.
This can be done once a week.
Ice Cubes
This is, by far, probably the most straightforward method.
Take one ice cube from your freezer and place it on top of the soil or bark surrounding your orchid’s roots.
This can be done twice a week but remember to remove any excess water that you see.
Pouring
If your orchid isn’t easily removed from the larger pot, you may have to use the tried-and-true method of pouring.
You will want to make sure to place the spout of your watering vessel near the base of the plant and not on the plant itself.
Be careful not to leave water in the folds of the leaves.
If you do, quickly dry them off, so moisture doesn’t gather.
You will want to pour about a fourth of a cup of water once a week to maintain a good watering level.
See next section for more info on how to tell when to water.
Feeding
Orchids really don’t need to be fed that often and when they do you want to make sure it is a diluted mixture.
There are a few ways you can feed your orchid:
Liquid/Pour
Using liquid food, you want to make sure you are super careful, just like if you are watering via pouring.
Do not pour over the leaves; use a watering can that has a narrow opening and only pour the food near the base of the root into the soil.
If you feed the plants this way, you will not need to water it, and then with the next watering, you will want to try to remove any remaining salt from the fertilizer.
Ice Cubes
This is simply using the diluted mixture you would pour over the soil and freezing it in cube form.
This method allows for a slower and better absorption of the orchid food.
See the Tips section for more info on feeding.
Humidity
Most orchids come from climates that have good levels of humidity.
That means it may be the most important thing you can do for your orchid.
There are ways you can create humidity, but when dealing with indoor growing, the easiest is probably using a spray bottle and misting.
You will not want to use tap water, instead use distilled so that you do not add any stray nutrients and minerals.
Here is how to mist orchids
Fill a bottle that as fine mist capability with distilled water.
You will want to lightly spray not only the roots but also the leaves approximately two times a day.
If you are worried about over watering simply use your finger in the pot test from above.
See the Tips & Techniques section on how to tell when to mist.
Pruning
Once the orchid has flowered, the blooms will drop off and die, and this is when pruning comes into play.
Check and see if the stem is still healthy or needs to get the ax.
If it is green and firm, then the answer is no.
However, if the stem is brown and super hard, then this guy needs to be removed as soon as possible.
Here is how you prune your orchid:
- Be gentle with the orchid as it is sensitive.
- Use a sharp set of shears to remove the dead leaves and any other dead pieces of the plant.
- Angle the shears downward, always making sure to trim on the diagonal.
- If you are trimming a healthy stem, cut just above the section node where the flower bloomed. This will stimulate a new shoot to grow.
- If you are pruning a dead stem, cut the stem at the base.
Light
Any plant needs light as part of its growing process.
The right light can mean the difference between a stunted orchid and one that blooms into its fullest glory.
So, you will want to make sure that your orchid is in the right place for optimal light exposure.
With a light, you have one of two options.
Indirect
This is sunlight or a growing lamp that is not directly targeted on the plant itself.
Usually, in this case, the light is bounced off a wall or something to diffuse the intensity of the light.
This is the light source that is best for the growth of your orchid.
Direct
Direct light may be good for some plants but not for your orchid.
So, make sure that your orchid is placed somewhere it will never meet direct sunlight or light in general.
See the next section for tips on how to find the right light and placement of your orchid.
Orchid Care Tips & Techniques
Now that you have the basics down let us get into some of the finer points, tips, and techniques you can use to optimize your orchid’s growth.
Watering
You may have to switch up your watering routine during the warmer months as the roots may dry out quicker.
So how do you know when you need to water?
If your orchid’s roots look like a canned green bean, then you are watering too much, and it is time to pull back.
If, however, they look like a dried-up stick, then you will need to water them more.
If you are unsure and can’t get a good look at the roots, then stick your finger in the pot.
If the soil is still damp, there is no need to water, and if it is dry, then your little orchid may be a bit thirsty.
Humidity/Air Flow
Low humidity and airflow levels can cause a lot of unwanted issues when growing your orchid.
Pay close attention to the following signs that may mean your orchid is humidity deficient:
- Decreased growth
- Flowers wilting and falling off
- Leaves with a brown tip
To make this process even better, you need to make sure that you have good airflow as well.
This air needs to be humid and dry to get the fullest from the combination.
Light/Placement
As for the optimal place to set your orchid, you want to choose a room in your house that stays constant in temp away from too strong of an airflow where it will only receive indirect light.
You can figure out if a place must be intense of light by simply holding your hand in the light at the hottest part of the day as close to the window place you are looking to house your order.
If the shadow is super distinct and dark, then the light is too intense.
You are looking for a light shadow for just the right intensity of light.
Feeding/Fertilizer
There is fertilizer designed explicitly for orchids that leave out specific components present in typical fertilizers that don’t play well with the roots of the orchid.
So, when looking for the right fertilizer, make sure you are getting the one that will be most effective for orchids.
When feeding your orchid with this fertilizer here are some great tips to pay attention too:
- You don’t want to boost fertilizer amount if you miss a week. You can, however, feed extra time with a decreased dose of fertilizer
- If you see your orchid with deep green and drooping leaves take a week off. You are overfeeding it
- When you see the orchid growing, that is when you want to make sure you are feeding it regularly
- If you see some things wrong with your orchid, pull back the feeding, and see if that helps
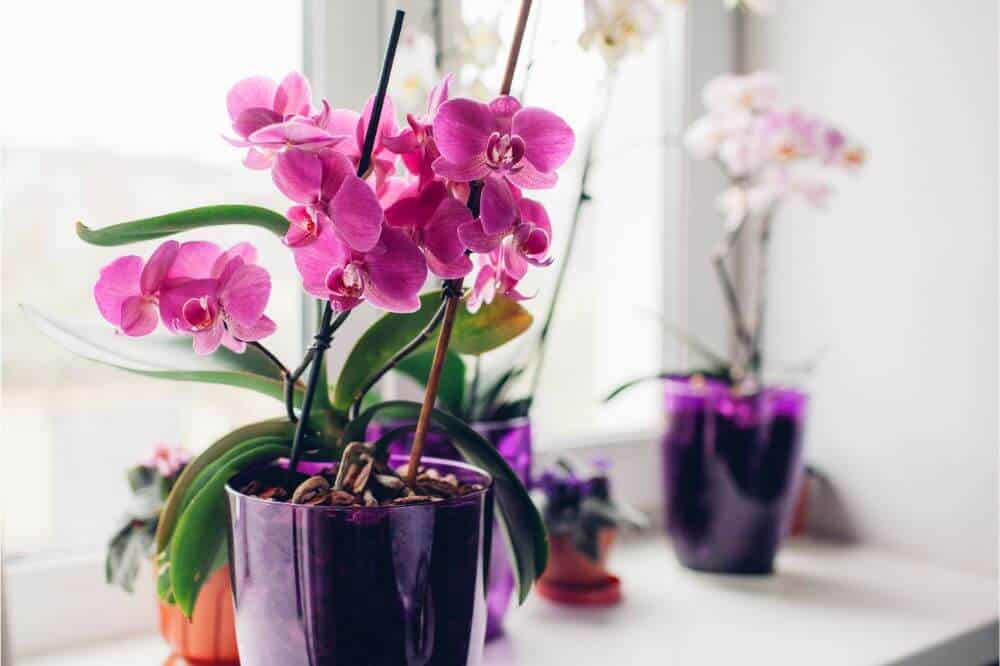
Pots
You will find many established orchid growers using clear pots so that they can always see the roots of the plant.
The clear construction of these pots helps in the photosynthesis process, and that will help your orchids grow faster and healthier.
You will want to find a pot that just fits the size of the roots and gets the orchid attached to whatever you are taking it as soon as possible.
Temperatures
This is solely based on the type of orchid you choose to grow.
Some orchids grow in every climate.
Some will require lower temps, and these are the ones found living in the high elevations and mountainous areas of each of the continents.
Others that live in tropical climates will react much better to warmer temps so when deciding which orchid go with make sure you consider your environment and the climate of where you will be planting your orchid.
Repotting
Deciding to repot is an important one.
You will want to do this if any of the two events below happen:
- The orchid is growing out the container it is currently housed.
- The other event that will mean you need to re-pot is when the bark or soil starts breaking down.
- Orchids use chunky mediums to grow in, and when you see that this is in smaller chunks, it is time to re-pot.
You will also want to make sure that you do it at the right time of the year.
This is also dependent on the type of orchid.
Some will be best re-potted after they flower but before the roots start to grow.
These are any that have a pseudo bulb system.
Every other type of orchid will be doable at any time a year.
Here is how you re-pot your orchid
- You will want to start with the new pot selection. The new pot should be a few inches taller than the previous pot your orchid has grown out of
- Look for orchid planters this will have holes around the circumference which allow for better airflow
- You will want to clean the pot with a light cleaning solution of half a cup of bleach and a gallon of water. Then let the pot dry completely
Potting Mix
- Put the orchid potting mix in a big bowl and activate it with hot water. Makes sure it is fully covered
- Once this is done, you will let the water cool down completely, then drain all the water from the mix
Moving the Orchid
- Fill the dry planter with the potting medium that you soaked earlier and place the pants in the middle of the medium’s top
- You will want to prune the roots that are a little sickly
- Place the orchid in its new home and cover the roots with potting mix; you don’t want them exposed
- Make sure you water regularly for the first few weeks
Sick Orchid
Orchids are very easily affected by bacteria and bugs. If you notice something is wrong here are some things you can do to help with a sick orchid.
- If you notice issues with your orchid, first move the plant away from others in the area.
- If you notice leaves browning, you can use a mist bottle with diluted cinnamon to sprinkle the trimmed plant to combat any bacteria. Or you can use chemical compounds that do the same thing.
- If this doesn’t solve the problem, there may be something wrong with the roots. Then the next step is to re-pot (use the steps above to do that.).
- Make sure that until you are sure the orchid is back on the right track, you will want to keep it isolated.
Blooming
There are different blooming seasons and frequencies dependent on the orchid you choose to grow.
Some will bloom once a year, and others will bloom continually throughout the year.
Some will bloom via the stalks and others will bloom via bulbs from the top of the plant.
There are those that bloom in sprays and some in single flowers.
These tips and techniques are just some of the ways you can use to ensure you get the best results from your orchid.
There are many other ways to build a routine that will grow a lush, healthy orchid.
These can all be added together to support any type of orchid no matter its native habitat.
Are Orchids Poisonous to Cats
How to Repot an Orchid
How To Water Orchids
How Long Do Orchids Live
Complete Guide to Orchid Types
Orchid Blooming Guide
Orchids need extra care
Orchids may take a little extra care, but, in the end, they are easy to cultivate.
By following a few easy rules and systems, you can manage to cultivate a beautiful orchid that will give you tons of enjoyment and make you proud of the work you put in to grow it.
The first and most important thing to do is know the genus.
Every orchid has its own unique aspects you need to focus on, and by learning as much as you can about that genus, you will be able to understand how to care for your orchid.