Home canning is an exciting activity for food preservation. It can also be a valuable resource to have in order to begin stockpiling food for medium- and long-term storage.
Ensuring you prepare home-canned foods appropriately can help you to avoid life-altering illnesses that come from the botulism toxin. Preserving fresh food properly is key.
As one of the main concerns with canning at home, this guide can help to walk you through the steps to take to make sure you’re using the best canning practices and keeping your family safe and safe healthy.
Canning Safety
Botulism poisoning is by far the most dangerous health risk of canning, but what is it exactly? Botulism a deadly illness from botulinum clostridium, a harmful toxin produced by bacteria.
Food-borne botulism occurs when the bacteria thrives and produces the toxin in home canning jars with little oxygen.
This toxin grows in moist environments deprived of oxygen, which makes home-canned goods the perfect breeding ground.
Even if there is a small presence of botulism in canned goods, it will multiply over a short period and, as such, can cause irreversible effects to anyone who consumes the tainted food.
On average, you are bound to start to experience symptoms of botulism within 12 to 36 hours of ingesting any food that is contaminated. These cases may present symptoms lasting up to 14 days.
If you suspect that you’ve ingested such contaminated food, some of the most prevalent symptoms you’d probably notice include:
- Nausea
- Fatigue
- Double vision
- Vomiting
- Dizziness
- Dryness in the nose and throat
- Paralysis
- Respiratory failure
- Death
As with many illnesses, certain populations may be more susceptible to botulism. Pregnant women, young children under five years of age, and individuals over 60 are the most at risk. If you have a weakened immune system, you are also at risk of experiencing some of the most severe symptoms.
One of the main reasons why botulism is so dangerous is because many people will think it’s a case of minor food poisoning. They may fail to seek medical attention until it is too late.
With that said, following the appropriate steps for canning and storing food can prevent Clostridium botulinum from forming.
How to Can Food
Before you start canning at home, you will want to delve into plenty of research. There are different recipes and processes for canning.
As an example, canning tomatoes will be a substantially different process than canning beans due to their acidic content.
For beginners, you will first want to make sure you know enough about canning and what it entails. Pressure processing at the correct processing temperature is essential.
One type of canning could be preferable, depending on the ingredients you want to work with. The other method is a little more costly because you will have to invest in more canning equipment.
Regardless, it is always better to ensure you have the proper tools to create safe and delicious foods, rather than trying to cut corners. Starting with quality mason jars with airtight lids is essential. As heated foods are cooled, they create a vacuum seal.
Types of Canning
There are three main types of canning methods, two of which are safe to do at home. Each of these processing methods is designed for different types of food. No matter which you choose,
1. Water Bath Canning
This is also known as the boiling water bath method. If you are working with high-acid foods, you will want to use the boiling water bath method. This will include foods such as tomatoes, pickles, jams, and fruits.
Boiling Water Bath (High-Acid Ingredients)
With a boiling water bath, you will find that it is relatively simple. There is little danger as long as you know how to prepare a pot of boiling water appropriately. In addition, it’s less expensive than pressure canning.
You will need to make sure the container you choose is large enough for your jars to be submerged by at least an inch. They will have to remain suspended in the water so that it can circulate the jars.
The reason it’s important to can foods with high levels of acid using this method is because the temperature won’t get hot enough for low-acid foods.
If you choose to can low-acid ingredients in a boiling water bath, you will be inviting botulism to grow inside of the elements.
This method is only for high-acid foods because the natural acid in the ingredients will prevent the bacteria from forming, and the relatively high temperature will kill any mold or yeast that could be present.
The water in your pot will then have to reach 212° F (100° C).
It is also essential to use sanitized jars and lids before adding the ingredients.
In addition, it’s highly recommended that you research the type of food you are preparing to determine processing times. This begins after the food has been put into the boiling water. Refer to water bath canning recipes.
2. Pressure Canning
Low-acid foods need to be canned using the pressure method. Pressure canning is the safe method to preserve poultry, seafood, meats, and vegetables.
High-acid foods have a pH level of less than 4.6, and low-acid foods have a pH of more than 4.6.
Pressure Canning (Low-Acid Ingredients)
The other type of canning requires a little more preparation and equipment. This method is called pressure canning. This is the canning process to use for low-acid ingredients.
You will need this method for low-acid foods because pressure canners reach substantially higher temperatures that will destroy any presence of botulism bacteria.
Pressure canners are heavy-duty pieces of equipment that come with a steam-tight cover, a pressure gauge, and an exhaust port. Internal temperature will reach degrees between 240 F – 250 F. Inside the canner, the water forms steams which replaces the air inside the canner. The pressurized steam heats the food.
Pressure canning steps:
- Sanitize all equipment
- Prepare the foods into their respective containers
- Add the jars to the pressure canner
- Fasten the lid and start the processing time
- Allow for the pressure gauge to read zero as the steam exhausts before opening
- Letting cans remain for 5 minutes reduces siphoning
You will want to make sure you allow the jars to cool in a draft-free room, and then ensure they’re exposed to room temperature so that they can seal properly. This will help ensure safe food processing.
What’s interesting is that if you combine low- and high-acid ingredients, it is technically classified as a low-acid food. This means you’ll need to use a pressure canner. Refer to pressure canning recipes.
3. Steam
Note, the USDA and the National Center for Home Food Preservation do not recommend households use the steam canning method. One reason for this is because there isn’t a lot of research on how long it takes to process jars in a steam canner for safe storage.
Atmospheric steam canning is for foods with pH values of 4.6 or below. With this method, you preheat the jars before you fill them with food. It’s important to keep them heated before processing.

What Can Be Canned at Home?
There seems to be an endless list of ingredients that you will be able to can at home, but the essential thing to note is whether they are a low- or high-acid food.
Below is a moderate list of the most popularly canned items that you can master at home with the proper technique.
High-Acid Foods
| Item | Approximate pH |
| Apples | 3.34 to 3.90 |
| Blueberries | 3.11 to 3.33 |
| Cherries | 3.32 to 3.93 |
| Cranberry Juice | 2.30 to 2.52 |
| Ketchup | 3.89 to 3.92 |
| Onions (Pickled) | 3.70 to 4.60 |
| Orange Juice | 3.30 to 4.19 |
| Strawberries | 3.00 to 3.90 |
| Tomatoes | 3.50 to 4.30 |
Low-Acid Foods
| Item | Approximate pH |
| Asparagus | 5.20 to 6.16 |
| Beans | 5.60 to 6.50 |
| Cabbage | 5.20 to 6.75 |
| Cream | 6.44 to 6.80 |
| Eggs | 6.58 |
| Peas | 5.70 to 6.70 |
| Potatoes | 5.40 to 5.90 |
| Spinach | 5.50 to 6.80 |
| Yams | 5.50 to 6.81 |
| Zucchini | 5.69 to 6.10 |
How Long Does Home Canning Last?
A general rule for home-canned goods is to keep them for one year but are best to be used before two years have passed.
If you purchase manufactured canned goods, they can last as long as five years. This is because they contain special preservatives that prevent the development of the botulism toxin.
You’ll find that most high-acid foods will have a much shorter shelf life than low-acid foods. This is something to take note of if you’re creating a substantial reserve for your family.
When you are preparing your food storage with your home-canned goods, it’s always a great idea to follow the FIFO rule.
FIFO stands for first in, first out. You will want to make sure you use your oldest cans of products first. It can be a great idea to invest in a label maker so that you can continually keep track of best-by dates to help make the FIFO rule easier to manage.
Many preppers also find that keeping a logbook of their ingredients can help maintain their inventory. This is especially helpful if you are stockpiling or storing a lot of canned goods.
You will want to make sure you sufficiently prepare your space to stay as organized as possible.
Inspecting Cans
In addition, you will need to inspect the packaging for any damage before eating, as this could negatively affect the quality of the food inside. If you notice some of your canned containers have rusted, are bulging, or have leaked, they could be contaminated. Watch for signs of food spoilage. This can be incredibly harmful.
There are plenty of people who argue the actual shelf life of home-canned goods. However, with labeling and rotating foods, you should be able to tell whether something is safe to eat or not.
Apart from inspecting the containers, you should check to see if there is any development of mold or discoloration of the food.
You will also want to pay close attention to the syrup or brine, as that should help you determine whether something is safe to eat.
Soured brine or syrup will be a different color (typically muddier), and the liquid level will have dropped drastically.
It is always better to be safe than sorry, especially with botulinum clostridium. Abiding by the one-year expiry is your best bet.
Our top recommendation is always to follow the most up-to-date instructions and tips for canning at home. They have improved drastically over the years and likely will improve in the years to come.
How Safe Is Home Canning?
One of the largest foundations of farming your food is to be able to preserve the food that you grow, also known as canning.
On average, households can store an assortment of ingredients for up to a year, if not longer, as long as they do so safely.
Canning at home has been popular over centuries, which means that it can be safe when knowledgeable individuals take part in the task.
Canning can also be an environment-friendly way to keep your harvested foods edible for later use. It’s an excellent way to store fresh food long term.
Your federal or local government has plenty of information about how to safely can food at home, even if you’re a beginner.
It is incredibly important to look at these regulations, as certain ingredients will have specific steps you will need to take to ensure the health of your canned goods.
You will need to consider the requirements for safe canning at home and the restrictions to home kitchens.
For example, if you intend to sell the canned goods you’re preparing, you will need to have a separate kitchen to prepare everything, especially in Canada.
This point is quite crucial for individuals who would like to open their own business selling handmade goods.
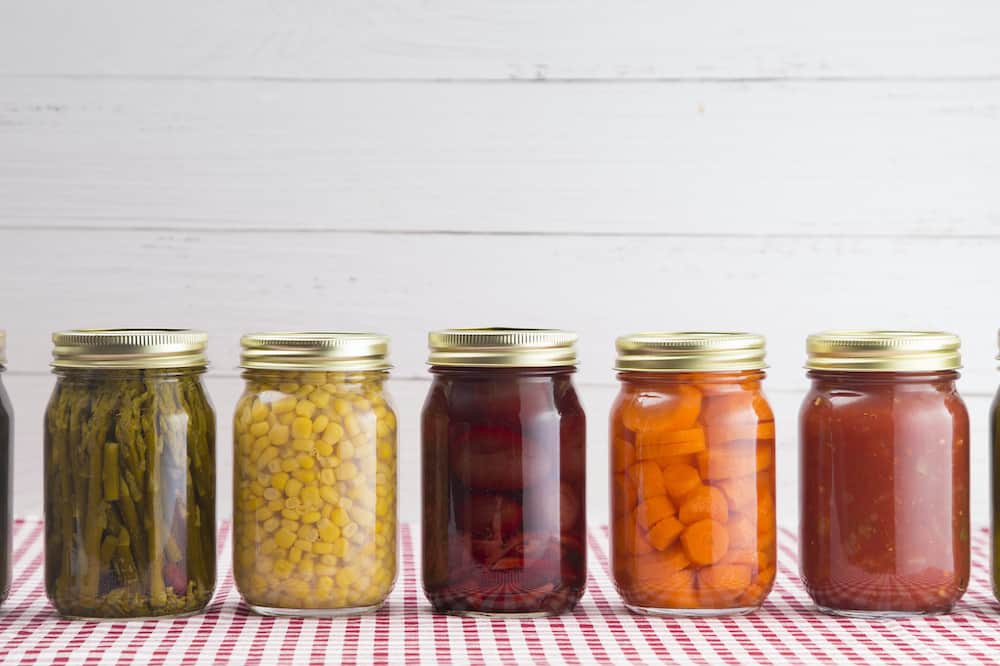
Home-canned food
Participating in home canning is a great way to make the most out of the fruits and vegetables that you harvest throughout the year. This includes fruits from apple trees, peaches, plums, etc. These are ideal for batch canning.
Another advantage is that it allows you to plan for survival food. By creating a substantial stockpile of food so that you have enough rations for your family in an emergency. Canning is also a way to preserve meats for a good protein source.
By taking the appropriate steps, including the necessary safety precautions, you can prepare a wide variety of delicious jams, spreads, pickled vegetables, and syrupy fruits for your entire family.
Looking for more ways to preserve food?
Related Articles:
- Can You Freeze Mason Jars
- See best food dehydrators.
- How to Freeze Corn on the Cob: The Three Best Ways
- How Long Do Fresh Eggs Last: Food Safety 101
- Benefits of Fermented Foods
- What Are Fermented Foods and Beverages